

| Availability | In Stock |
|---|---|
| Condition | Brand New |
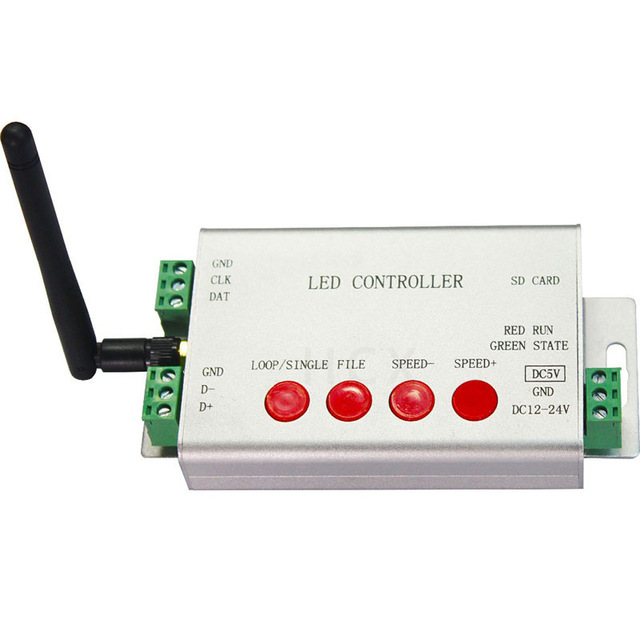
Item Type: RGB Controler
Model Number: H806SB
Max. Load Power: 3W
Remote Distance: 25m
Features: WiFi remote control
Warranty: 1 year
Voltage: 5-24V
Certification: CCC,RoHS,CE
Wattage: 0.5W
Material: aluminium alloy
Power Source: DC
Connection Mode: WLAN
Controled Method: WiFi control
Applicable Lights: led full color strip
sdrive pixels number: 2048
1. Features
(1). One port controls maximum 2048 pixels.
(2). You can connect your android phone to H806SB via WLAN to control leds.
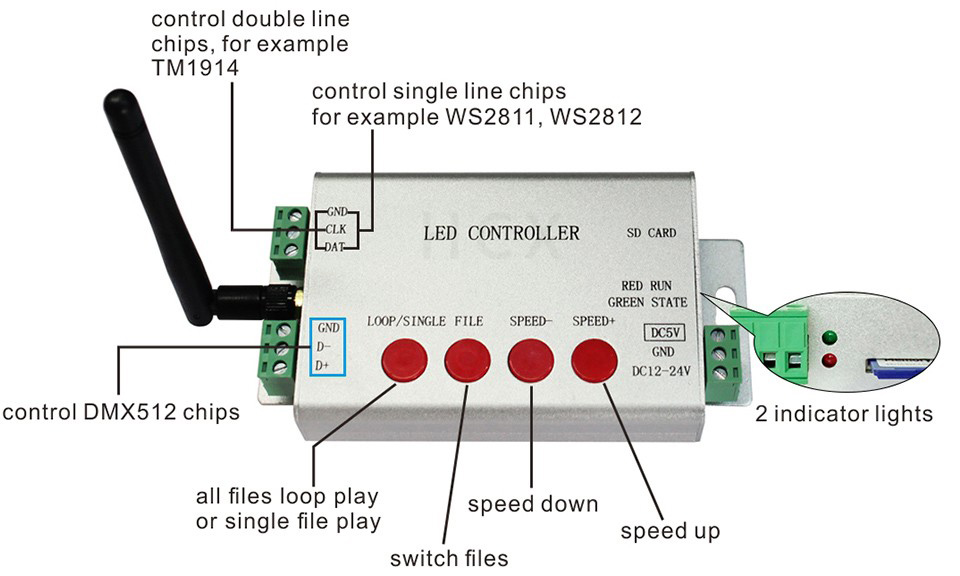
(3). H806SB supports dozens of single-line and double-line chips.
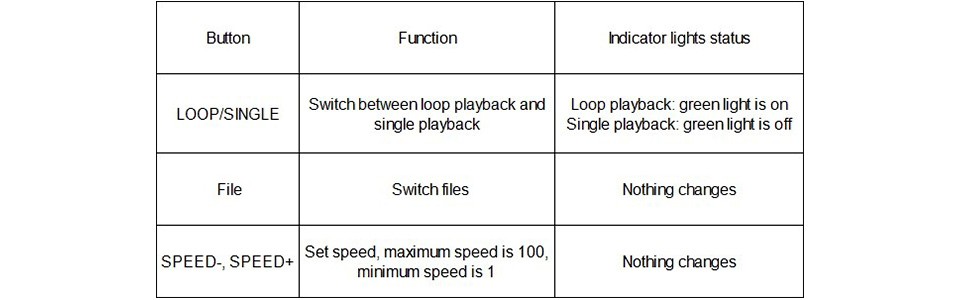
(4). You can also use four buttons to set play mode, switch files, increase or decrease speed.
(5). DC5V or DC12~24V input.
(6). Maximum control radius: 25m
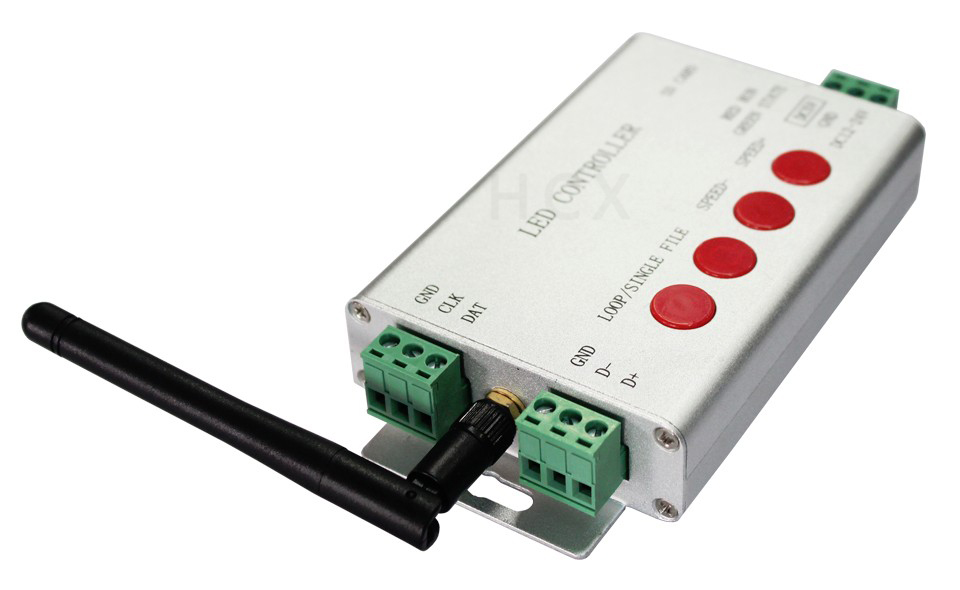
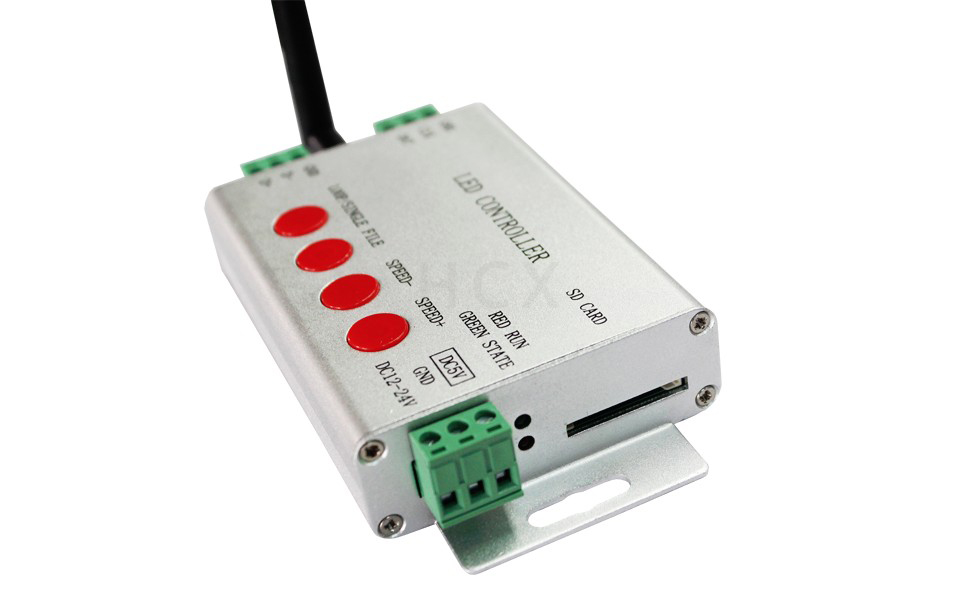
2. Product Display
Product Display
3. Supported Chips
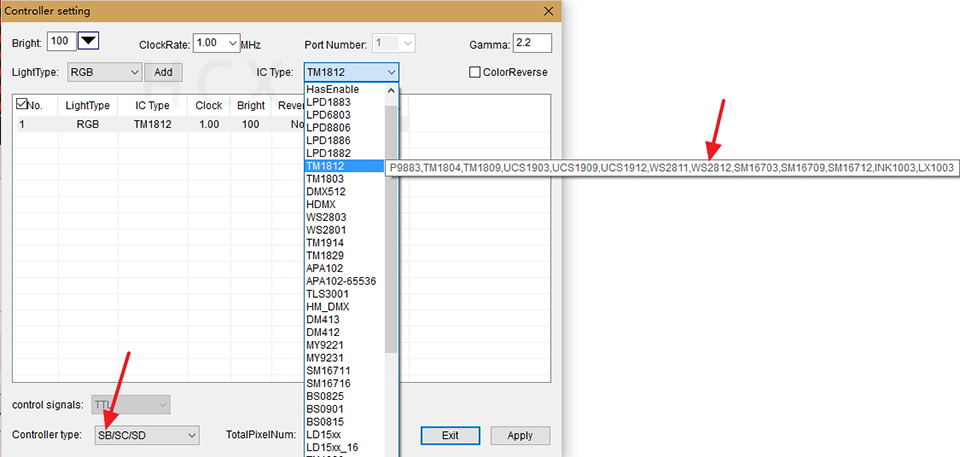
LPD6803, LPD8806, LPD1882, LPD1889, LPD6812, LPD1883, LPD1886, DMX512, HDMX, APA102, MY9221, UCS6909, UCS6912, UCS1903, UCS1909, UCS1912, UCS8904, WS2801, WS2803, WS2811, WS2812, TM1803, TM1804, TM1809, TM1812, TM1829, TA9912, TM1913, TM1914, TM1926, TM1814, INK1003, LX1003, LX2003, LX2006, TLS3001, P9813, P9816, SM16711, SM16716, LD151x, LD153x, MBI6021, MBI6023, MBI6024, etc.
Note: H806SB supports more than the chips listed above(some chips have the same sequence diagram, for example UCS2903 has the same sequence diagram with UCS1903, H806SB supports them all).
4. Workflow
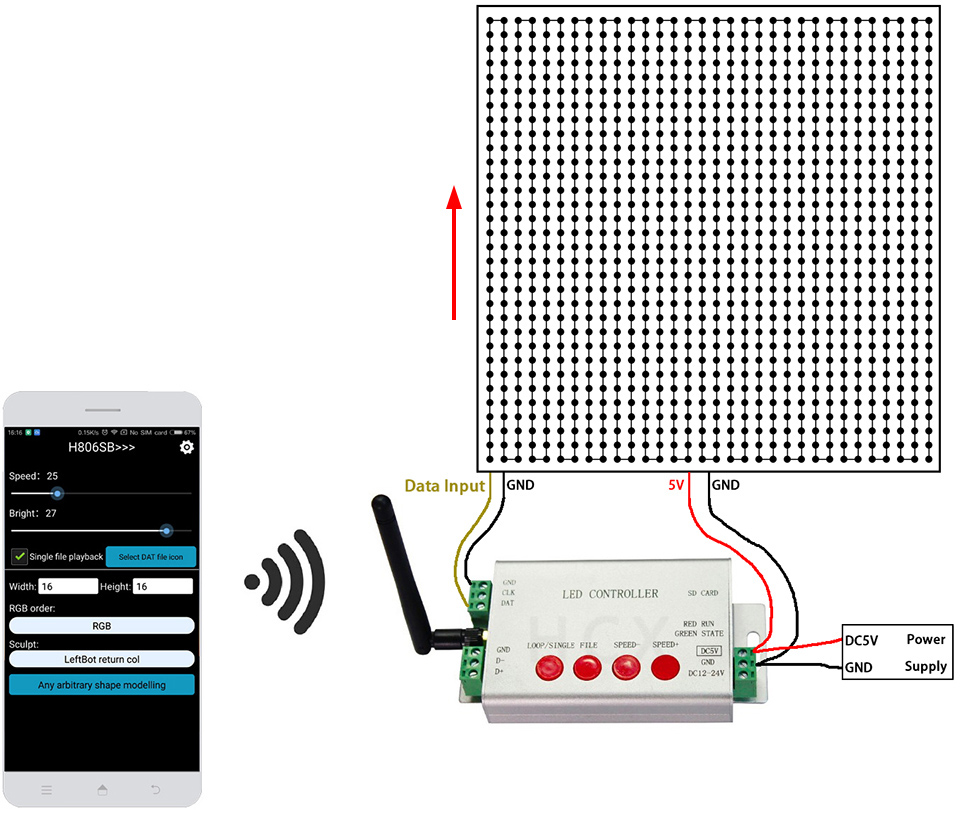
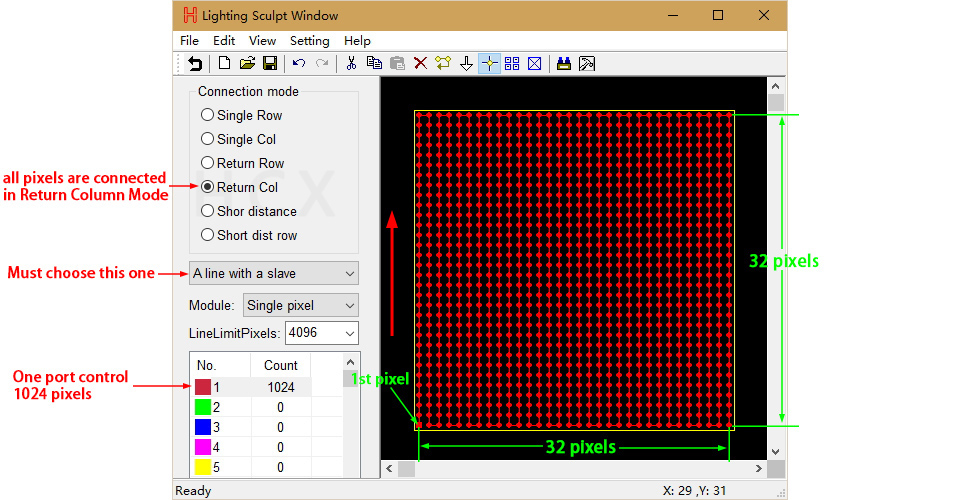
Assume you have a 32*32 (pixels) WS2812 panel
Step1. Set them up
Step2. Program with LED Build Software
(1). Place Pixels
(2). Light Setting
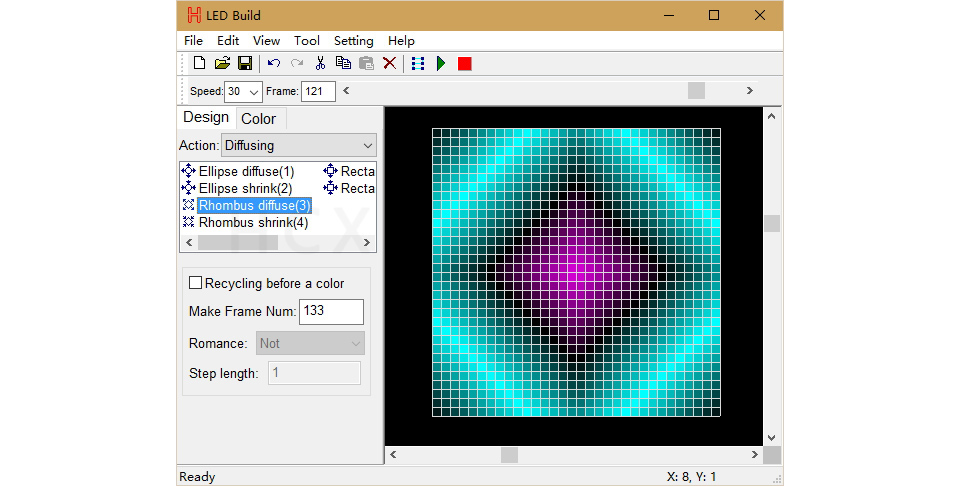
(3). Make Effects

(4). Output controller data and put it into SD card
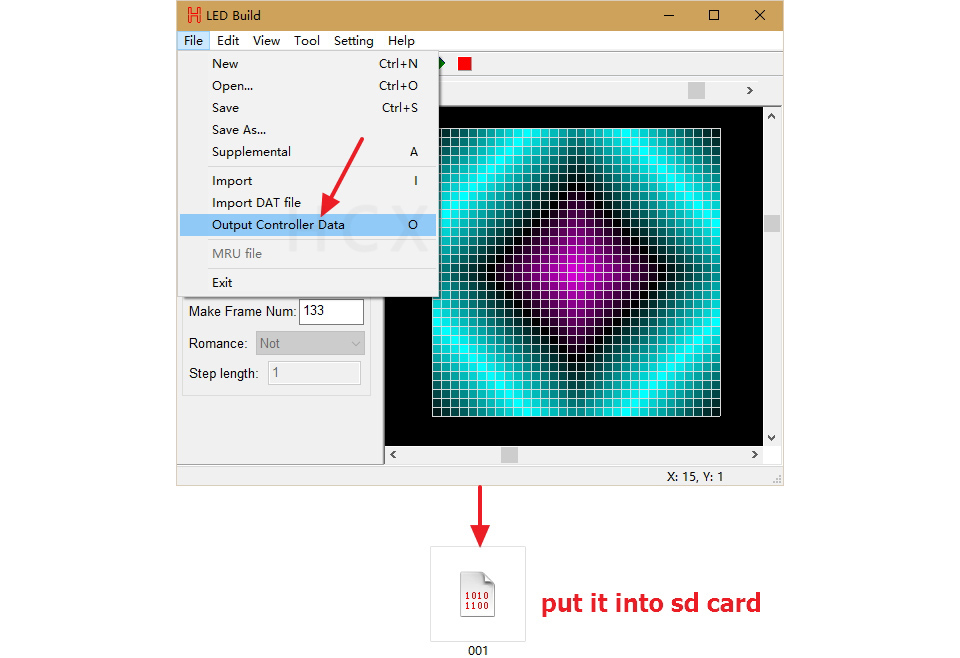
For more details, please refer to the tutorial video post above.
Test file download: https://drive.google.com/open?id=1b4xo0-NmN_XCVcbCdo6F-YNwfHE0YzrU
(one line 200 pixels, for WS2811, WS2812 strip, copy them to sd card)
Step3. Control panel with 4 buttons
Power controller and panel up, now you should be able to control panel with four buttons.
Step4. Control panel via phone
APP for android phone: H806SB
Assume we've had 6 files in SD card
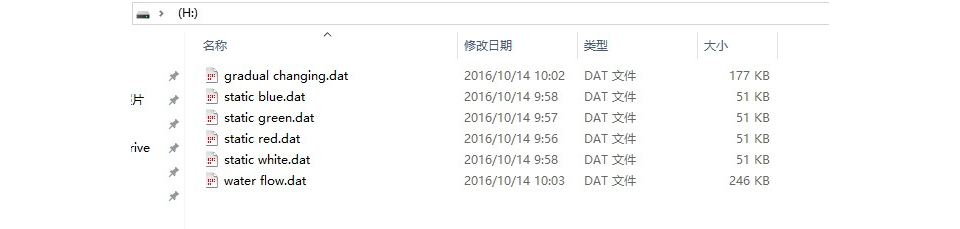
Install LEDDPF. apk and open it
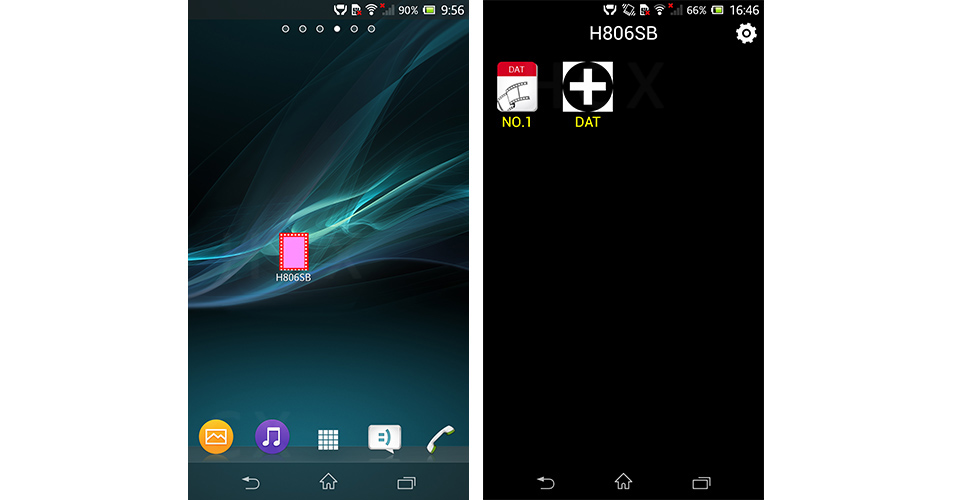
Click controller name in "WLAN Set", connect controller to phone.
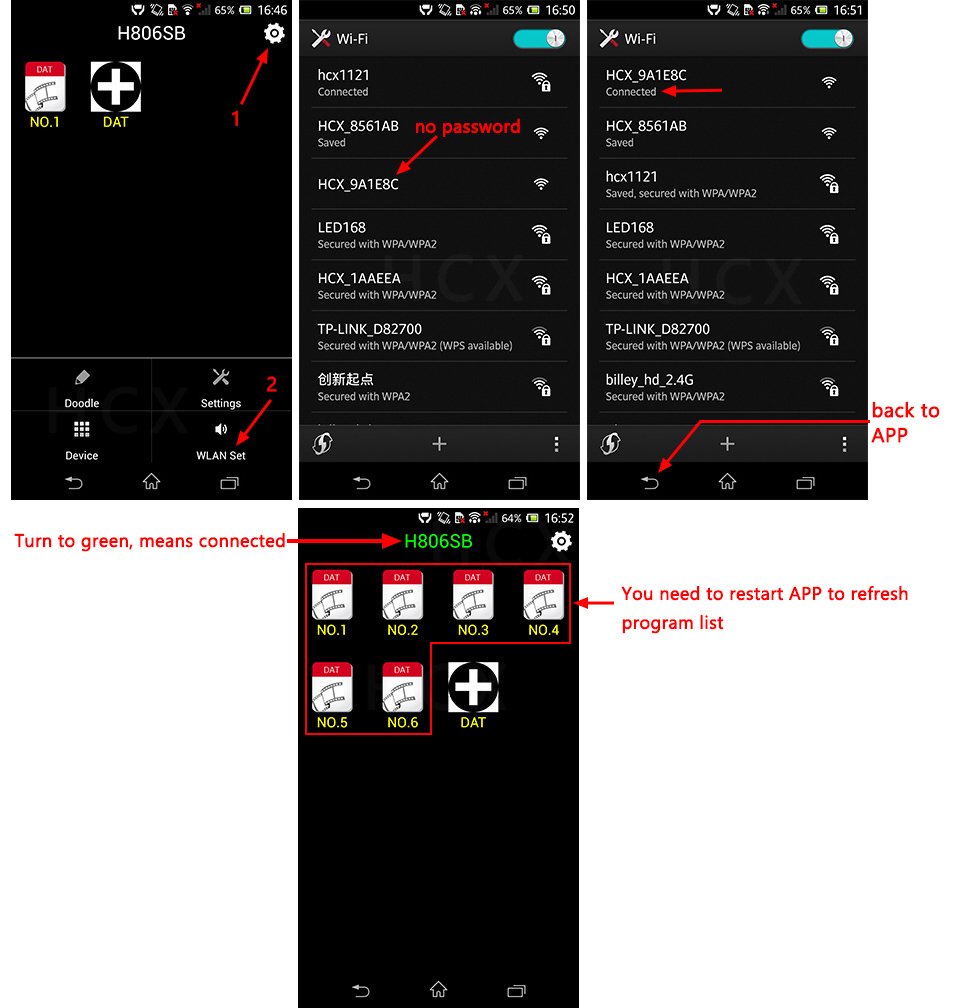
Note:
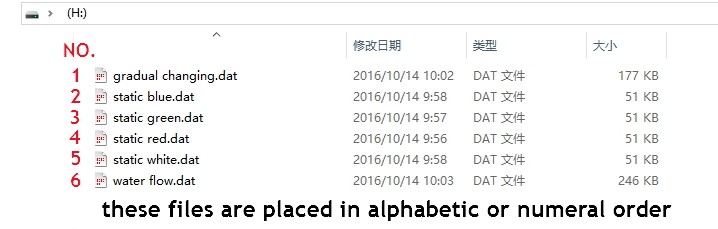
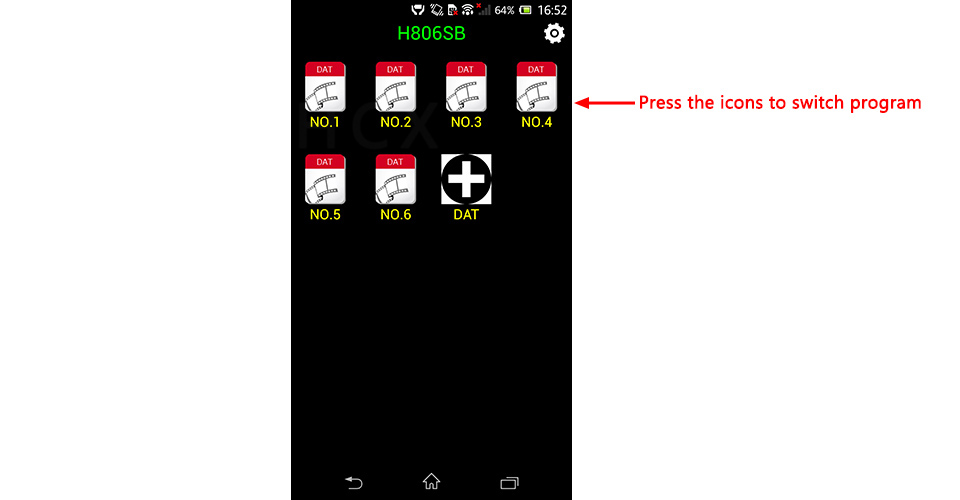
Now you can press these icons to switch program.
Press menu "settings" to adjust speed and brightness.
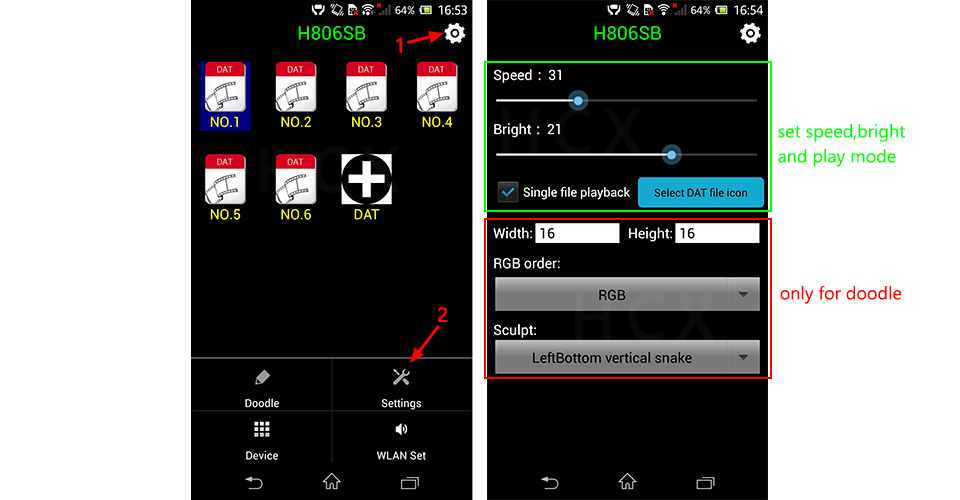
So far, you can switch programs, change speed and brightness with phone.
Step5. Doodle
In this example: 32 pixesl by 32 pixels WS2812 panel
Width and Height: 32
RGB order: RGB(for instance)
Sculpt: Left Bottom vertical snake(for instance)
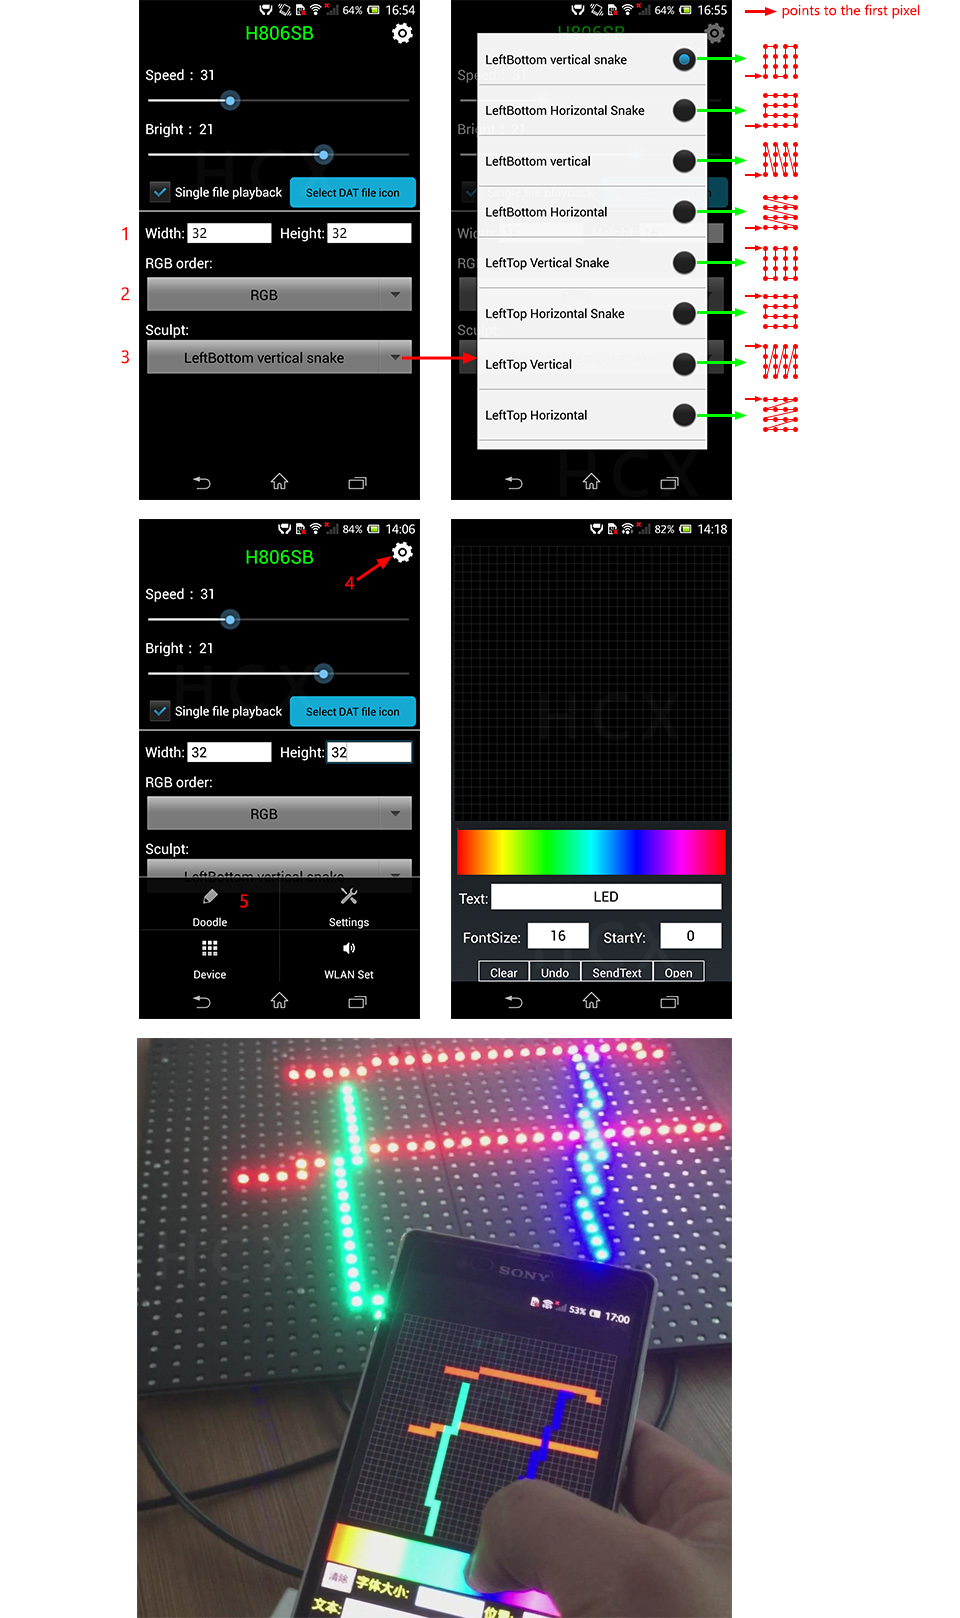
Step6. Configure Router
Note: before configuring each H806SB to router with phone, make sure your phone has been connected to each H806SB directly
Note the color of "H806SB" in the following example, it's green, which means phone has been connected to H806SB directly
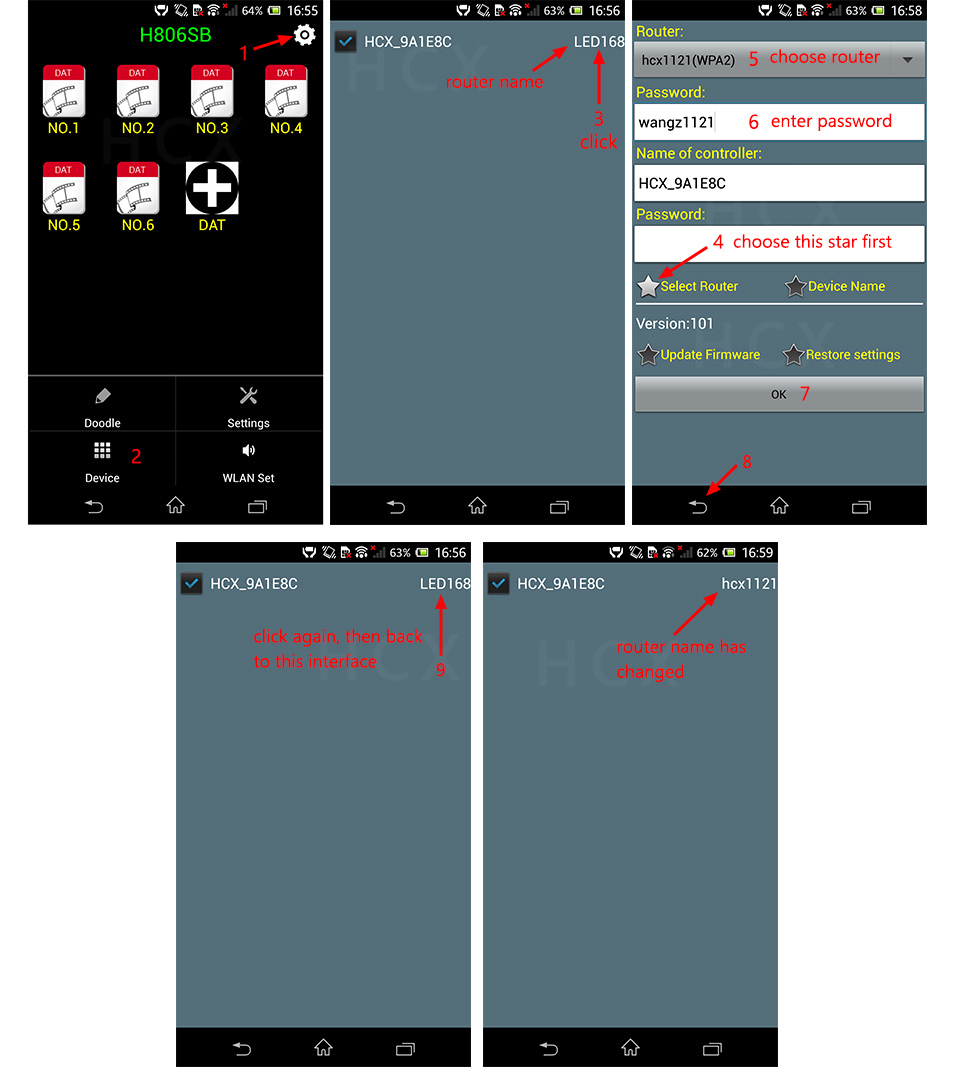
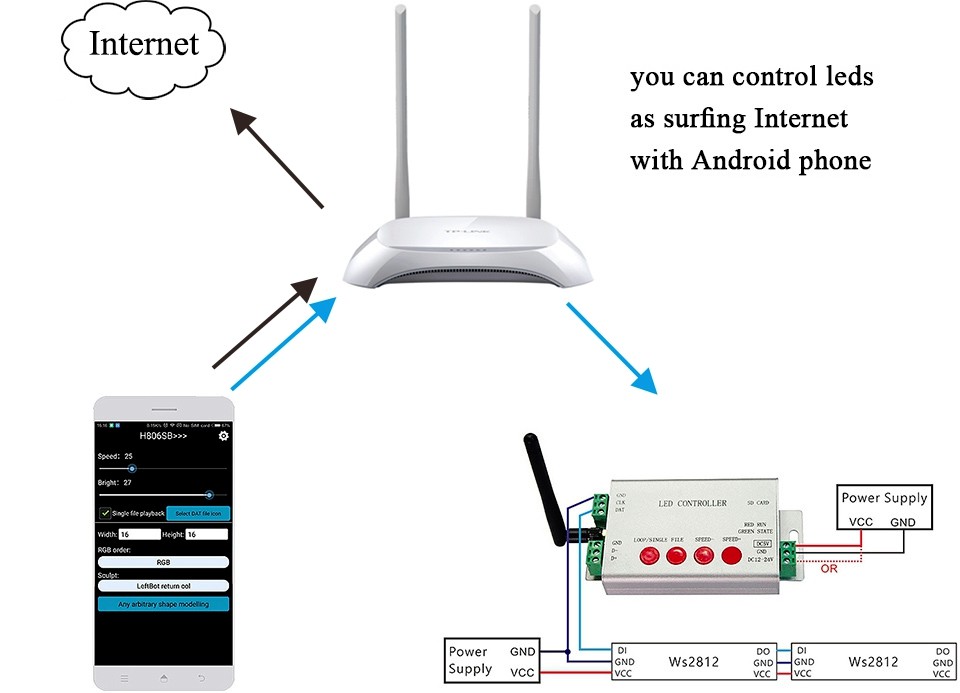
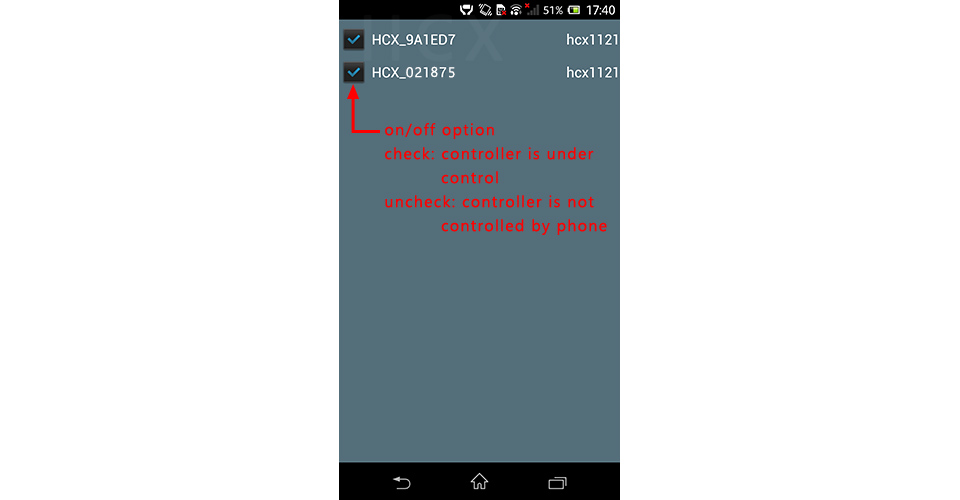
If you have mutiple H806SBs and want to configure them all to router.
For the first H806SB, just connect phone to it directly first, then connect it to router.
For the others, just do the same.

5. Button operation and indicator lights status
Power controller on.
With SD card inserted, green light is on and keeps still, red light is flashing.
Without SD card, green and red light are on and all keep still.
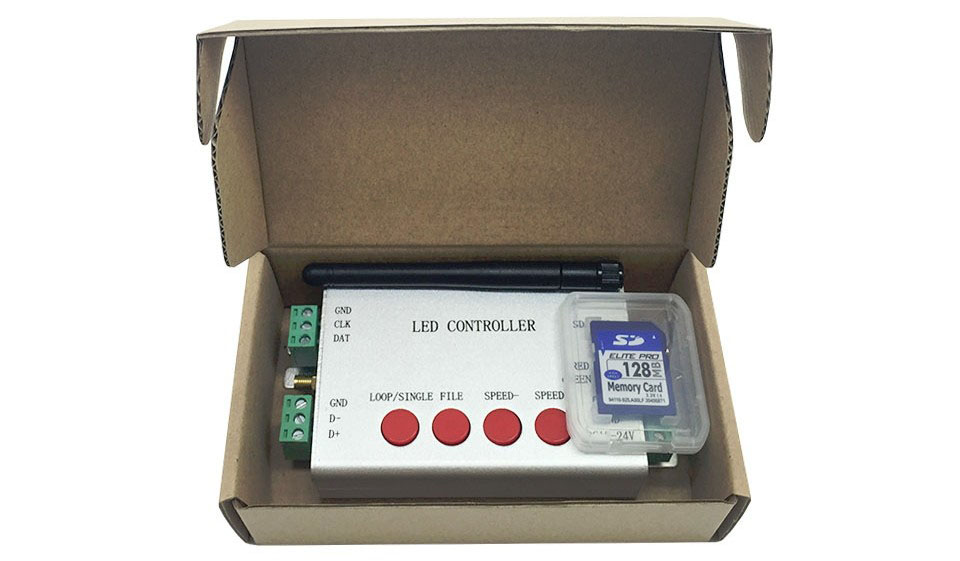
6. Package Include
7. Specifications
Input Voltage: DC 5V~24V
Power Dissipation: 0.3W
Drive Pixels Number: 2048
Control Radius: 25m
Weight: 0.34KG
Dimension: L150 x W82 x H38