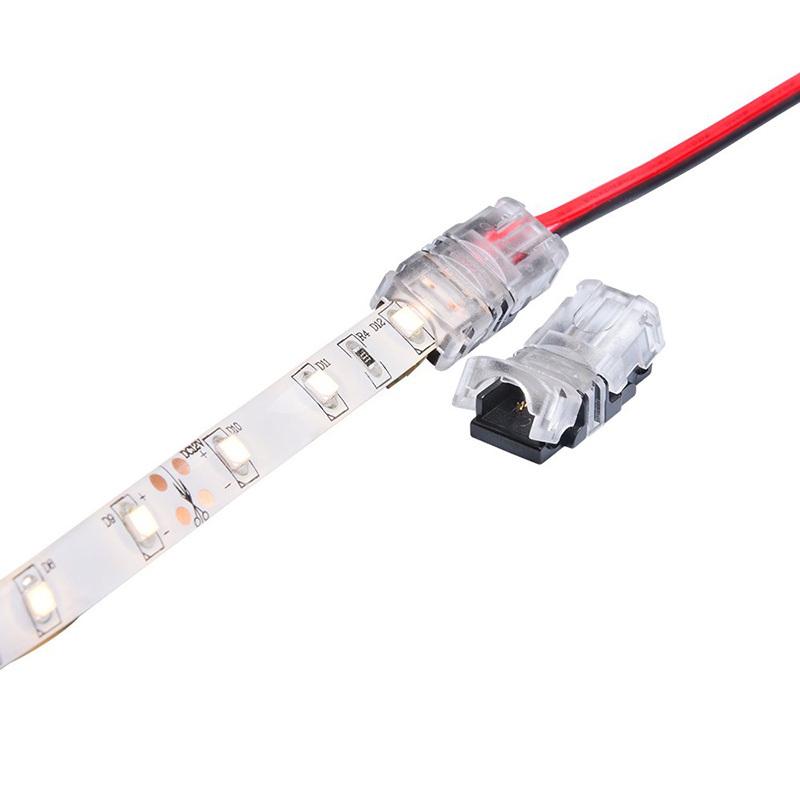
| Select Applied to: | Non-waterproof IP20 (Base), Waterproof IP65 (Base) |
|---|---|
| Select Type: | Connector + Wire (Base), Connector Only |
| Select Width: | 10mm (Base), 8mm (Base), 5mm (Base) |
| Availability | In Stock |
| Condition | Brand New |
Features:
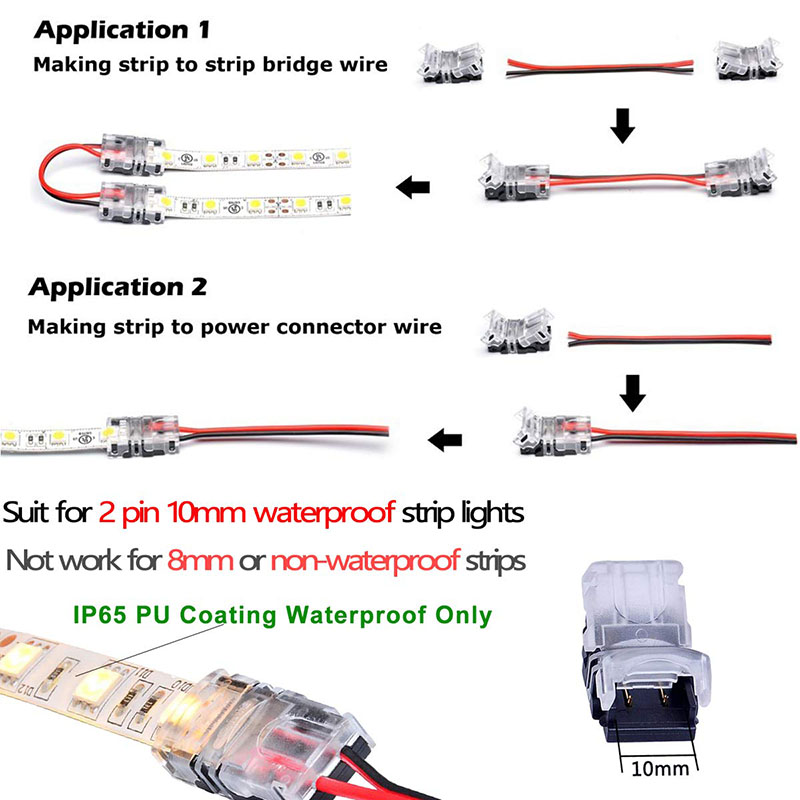
1. You can DIY strip-to-wire-bridge led fast connector wire that is up to 0.5 meters long
2. No need stripping wire insulation nor waterproof coating of led strip light before connection (pierce-to-contact), easily connect your led strip to power, dimmer or controller without any soldering, just pliers needed
3. Powerful with as much as total 10A current supported, allowing you to connect longer LED strip by one connector, reducing cost and connection work
4. With help of innovative inner-arc cap to fit strip light coating surface and pierce-to-contact design, the connector can grip strip light tightly, never worry strip light or wire moving out of the connector. Even workable to strip light with 3M VHB red foam adhesive tape
5. Applicable for SMD3528 / SMD3014 / SMD2835 / SMD2110 / SMD5050 / SMD5630 / SMD5730 strip light in different LED density ranging 30~120 LEDs per meter
Product Specification
Package Dimensions: 5.3 x 3 x 0.3 inches
Size: 1 of 8 mm Connectors + 1.64ft Feet 2C Wire
Color: Black-Red for Single Color WATERPROOF IP65 or Non-waterproof IP20
Style: Strip to wire
Finish: Copper
Material: Plastic
Special Features: Max Current 10A,Max Voltage 24V
Usage: LED Strip Light
Included Components: 1 pcs connectors, 1.64ft wire
NOTE:
1. Make sure your LED light strip is 10mm width 2 pin IP65 WATERPROOF single color strip light. Not work for non-waterproof or 8mm width led strip lights.
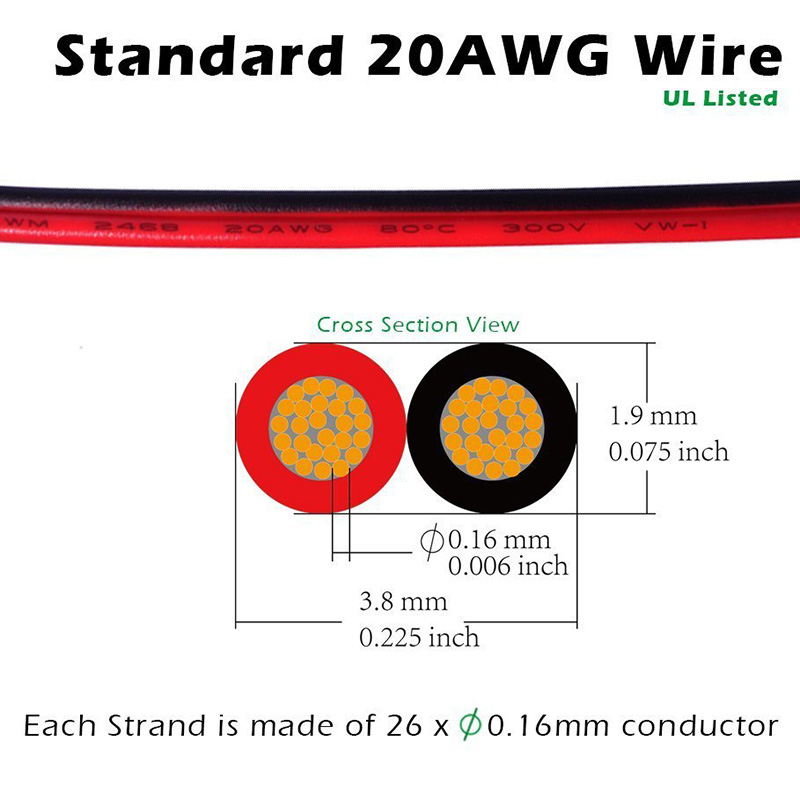
2. Ensure your Wire Diameter is within range 20AWG-22AWG /0.34~0.75 mm2 and without stripping wire.
Installation Guides
Strip End Connection
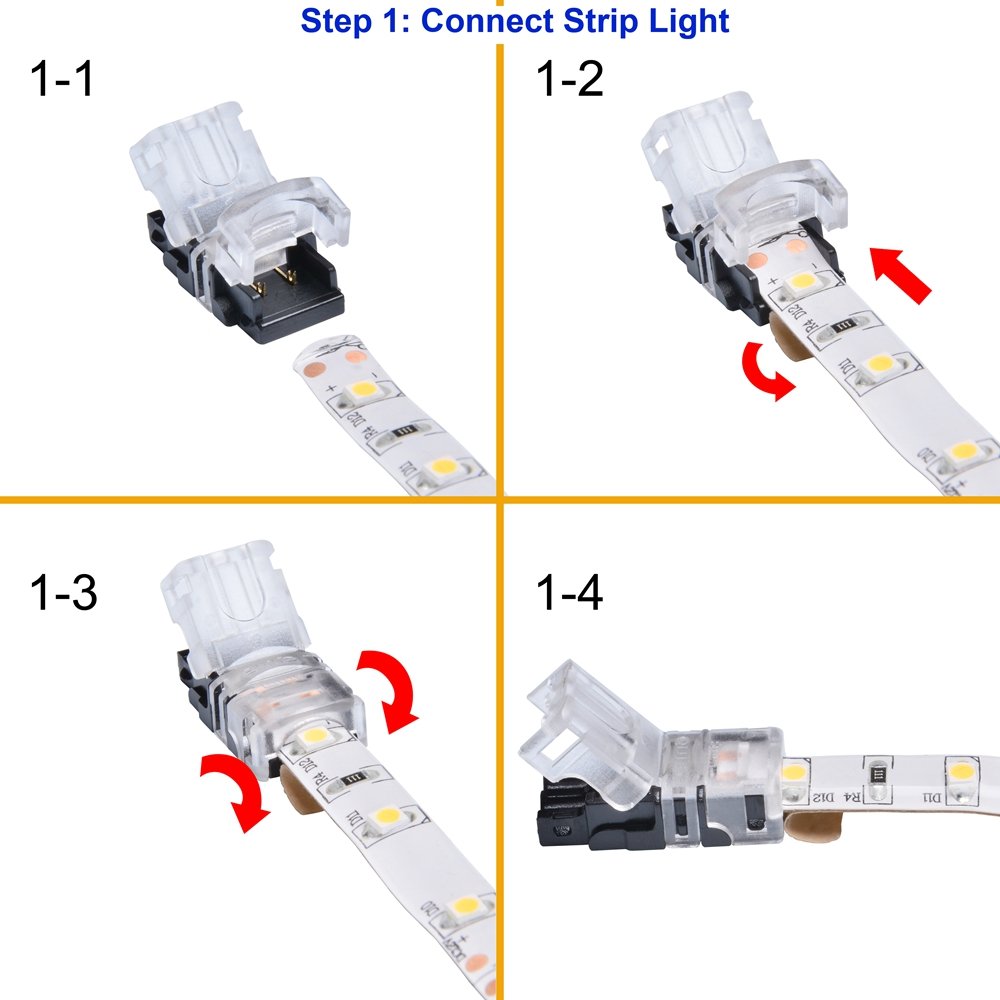
1. Ensure your LED light strip is waterproof 10mm width and has 2 contacts (+, -). All contacts are clean and cut the strip straightly.
2. Open the transparent cover of connector up to 90 degrees.
3. Peel off the 3M tape around the cutting line area on the back of the LED strip, then insert the LED light strip into clasp side, with the 2 contacts of the LED strip sitting on the 2 pins of the clasp. (Note: No need to peel off the silicone on the surface of the led strip around soldering line area)
4. Close the clasp down with force by pliers.
Wire End Connection
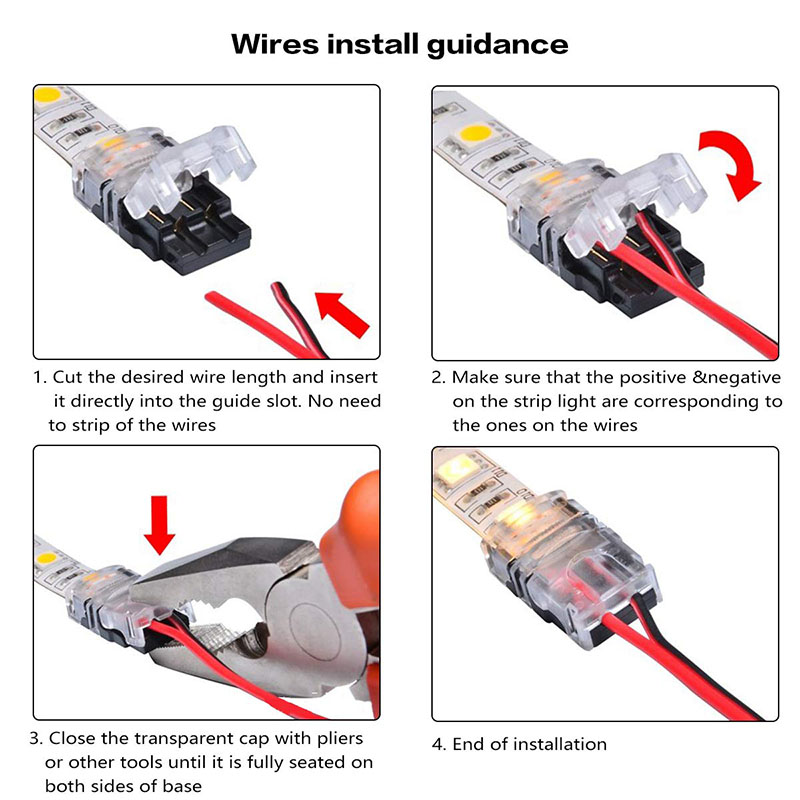
1. Cut the desired wire length you need and separated the 2 wires (20-22AWG) around connection part.
2. Insert wires into the connector guide slot; Make sure that positive & negative on the strip light surface are corresponding to correct wires.
3. Close the transparent cap with pliers until it is fully seated on both sides of the bottom base. Ensure the metal joint pierces through the wire insulation. (Note No stripping wires. The positive wire is matched to "+" input power mark on the strip light surface)