

| Select Kit: | Panel+Remote (Base) |
|---|---|
| Select Model: | K1- 010V (Base), K1- PWM5V (Base), K1- PWM10V (Base) |
| Availability | In Stock |
| Condition | Brand New |
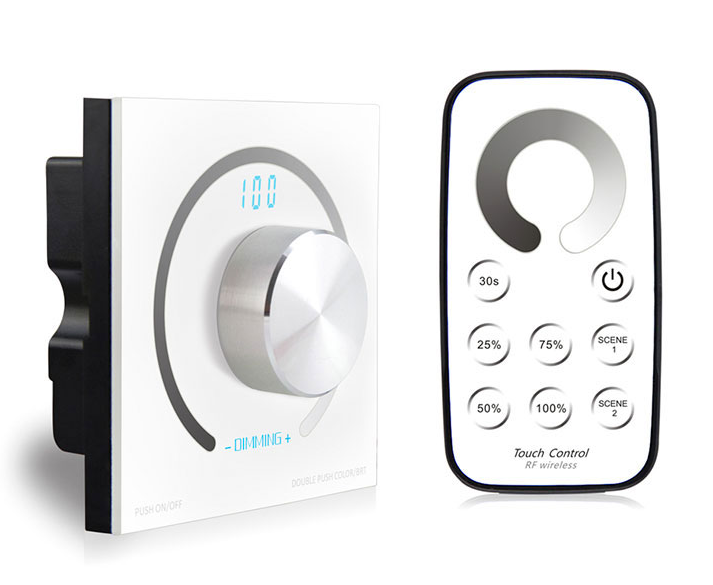
This LED signal dimmer is AC85-265V input, and outputs AC85-265V, 0-10V analog signals, PWM 5V or PWM 10V signal. With our T1 wireless remote to control led lamps by radio frequency, and adjust the signals, easy to install, it's suitable for commercial or household standard 86 type socket base.
1. Automatically adapt to AC85-265V working voltage.
2. High voltage input, isolation power supply, can be used with dimming power.
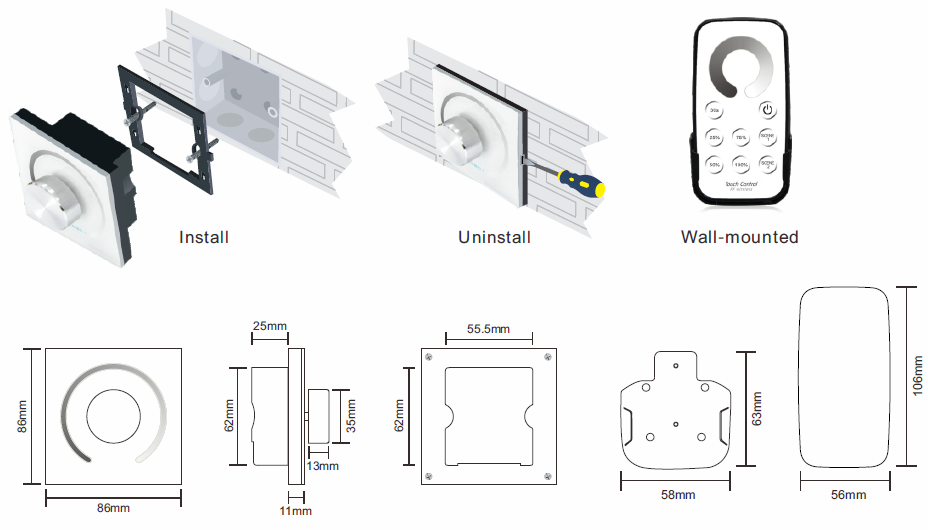
3. Standard 86-style socket, easy to install.
4. Rotary knob adjustment, fashion design, simple to use.
5. 2CH output, 100 brightness level.
6. Power loss memory function.
Product parameter:
Model: K1- 010V,
K1- PWM5V,
K1- PWM10V
Input Voltage: AC85-265V
Output Voltage: AC85-265V
Max Output Current: 10A
Output Signal: K1- 010V: 0-10VAnalog Signalx2CH
K1- PWM5V: PWM5V Signalx2CH
K1- PWM10V: PWM10V Signalx2CH
Max Output Signal Current: 60mA
Working Temp: -20°C-55°C
Dimension: L86×W86xH51(mm)
Weight(G.W): 130g
Model: T1 Wireless Remote Control
Working Voltage: 3V(CR2032)
Working Frequency: 433.92MHZ
Remote Distance: 40m-50m
Working Temp: -20°C-55°C
Dimensions: L106×W56xH9(mm)
Weight(G.W): 40g
Standards and Certifications


T1+K1-010V 
The Learning ID Method of Remote Control:
Remote control has been matched to the dimmer before delivery, if deleted accidentally, you can learn ID as follow.
Learning ID: In the state of power off, long press rotary for 3 seconds, when the digital tube displays 'FF', then press any key on the remote control. The digital tube flashes 3 times, and the controller is ON, the remote and controller is matched.
Note:
The controller is inactive if no settings are made to it after 1 minute, press any key to turn it on before normal operation.
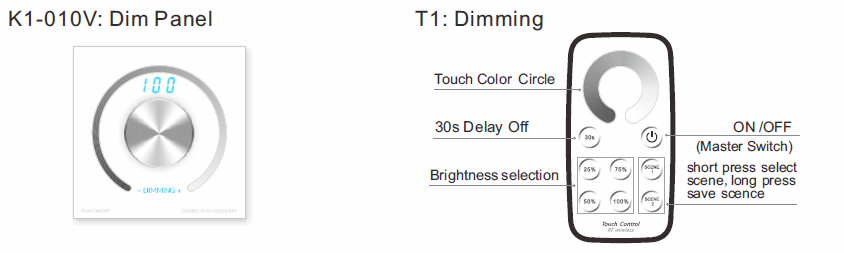
Short press: turn on/off LED controller
* Adjust rotary: increase or decrease brightness, range from 1~100.
Notice:
1. The digital tube is inactive if no settings are made after 1 minute, does not affect the output effect. re-operate the rotary to turn it on.
2. Restore factory defaults: In the state of power off, long press the rotary and power on, after 0.5 second, release the rotary, the dimmer is on. after restoring factory defaults, the dimmer and the remote need to rematch the ID.
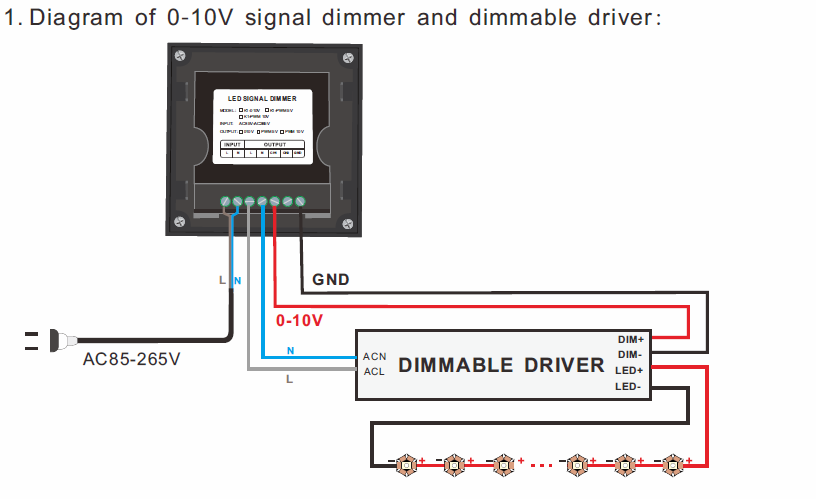
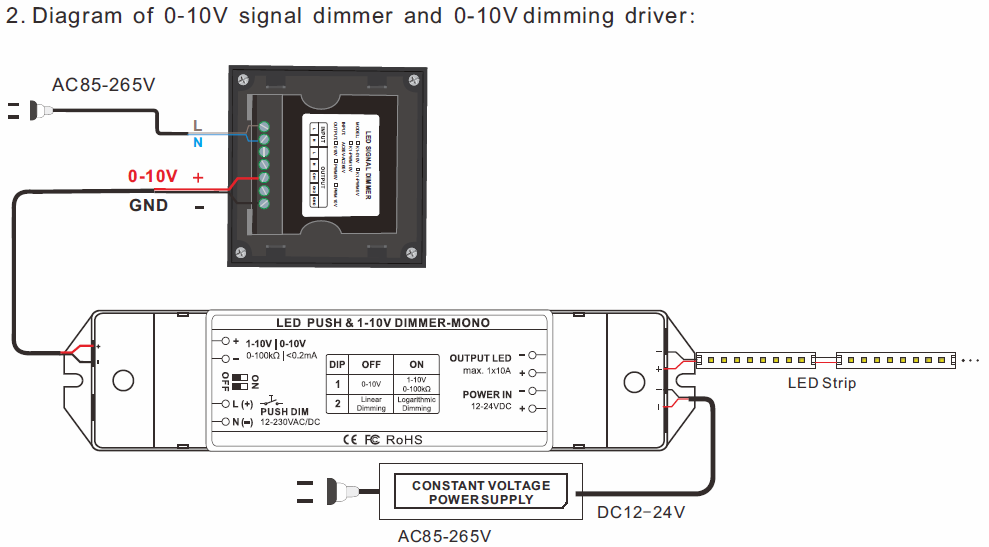
For the dimmer driver or dimming power which can be completely turned off only via dimming signal, can connect only the dimming signal of dimmer, without using other voltage output.
Safety warnings
1.In order to use it properly and safety, please read user's manual carefully before installation.
2.Please don't install this controller in lightening, intense magnetic and high-voltage fields.
3. To reduce the risk of component damage and fire caused by short circuit, make sure correct
connection
4. Always be sure to mount this unit in an area that will allow proper ventilation to ensure a
fitting temperature.
5.Don't connect cables with power on; make sure a correct connection and no short circuit checked with instrument before power on.
6. Please don't open controller cover and operate if problems occur.The manual is only suitable for this model; any update is subject to change without prior notice.