

| Availability | In Stock |
|---|---|
| Condition | Brand New |
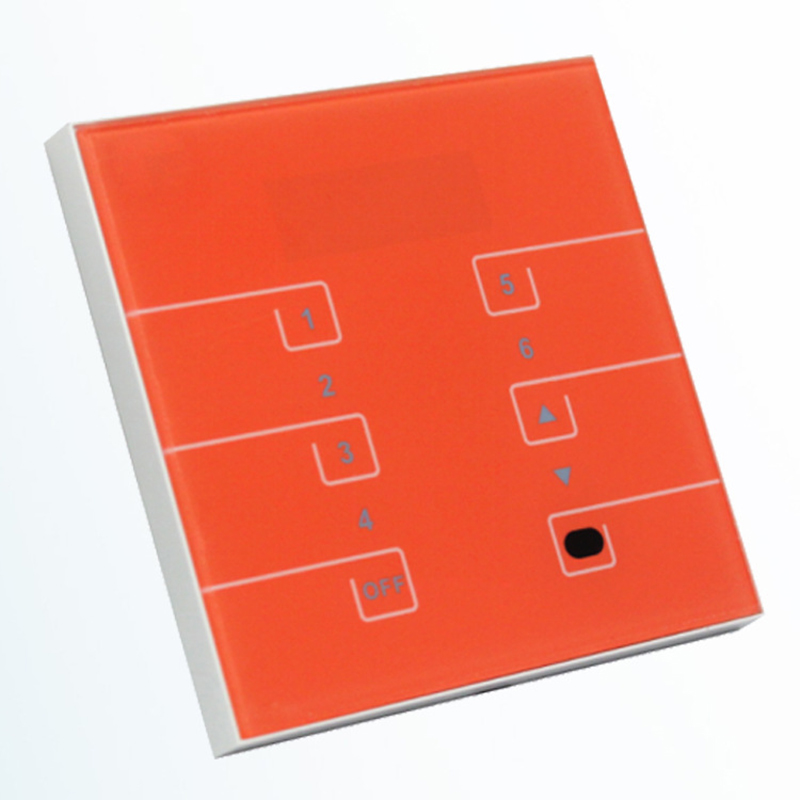
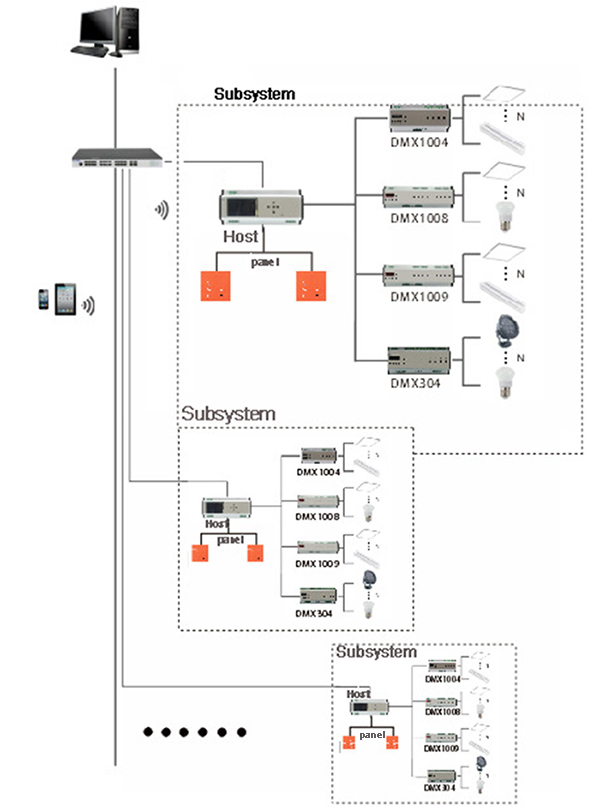
The universal control system is a set of intelligent lighting control systems developed in response to various indoor and outdoor scene lighting control of hotel lighting, building lighting, etc. The overall design scheme is based on the principles of humanized operation and personalization. The system can be controlled through a computer network The entire system is monitored to monitor the current working status of each lighting subsystem; it can be linked to the DALI system, DMX system, central control system, 485 bus, TCP/IP. At the same time, it can be extended to the intelligent control of the entire home or business system.Universal control system touch control panel with EDX series dimmer. The glass panel design and high-precision capacitive touch control chip increase the touch sensitivity and reduce false triggering. Beautiful and fashionable appearance.
Product Features
1. Compatible with EDX;
2. Can control 128 areas, can store 896 groups of scenes, each group of scenes controls 512 loops;
3. Built-in timer, can set fade time;
4. Can be programmed through the network;
5. You can use the touch screen to directly configure the parameters, simple and clear;
6. Can be used with EDX series dimmers to call lighting scenes;
7. One control panel can control one or more EDX dimmers or devices at the same time;
8. Can achieve 256-step dimming resolution;
9. Can receive infrared rays.


Technical Parameters
Working Temperature: -20-60℃
Power Supply Voltage: DC12V-24V
Output Mode: EDX signal (RS-485)
Communication Protocol: RS-485
Net Weight: 130g
Gross Weight: 220g
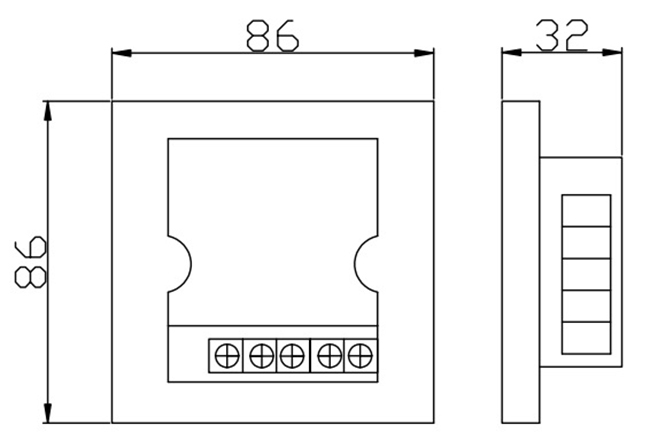
Dimensions: L86*W86*H32mm
Packing Size: L110*W110*H56mm
External Dimension
Functional description
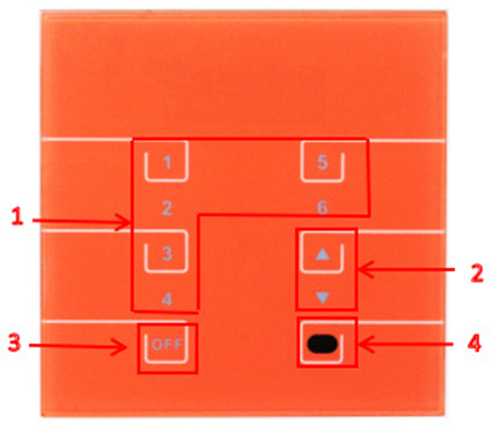
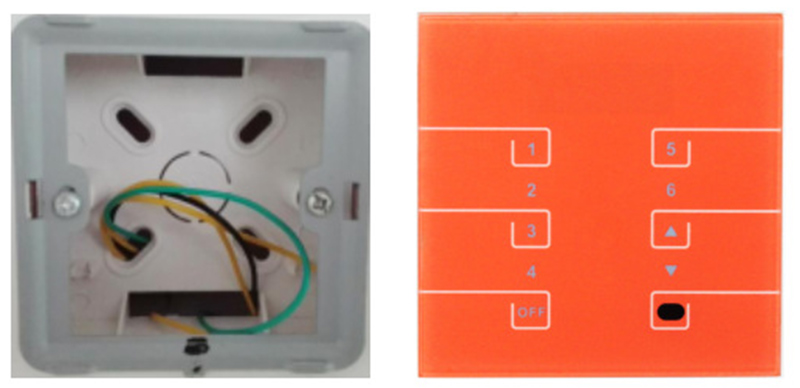
Key Description
|
Serial Number |
Features |
|
1 |
1-6: Fine adjustment key |
|
2 |
▲▼: Brightness increase / area adjustment |
|
3 |
OFF: off |
|
4 |
Infrared receiver |
Interface Description
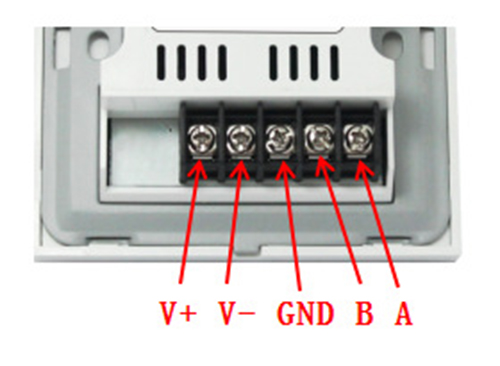
GNC, B, A are EDX output, V+, V- are DC power input
Instructions
① Connect the line.
② By default, the single area is controlled by power on, and the area code is 1.
③ The -6 button is the scene mode key of the selected area, you can select different scenes.
④In scene mode, short press UP and DOWN to adjust the light brightness.
⑤ Long press OFF to enter or exit the area setting mode.
⑥ In regional setting mode:
In the area setting mode, short press UP and DOWN to adjust the area number (1-127) as the confirmation button. When the area number value is determined, click 6 to confirm and save. If you save multiple areas, you can control multiple areas. Multi-zone control, up to nine.
1000 is displayed at power-on, indicating that the default power-on area code is 1. This is the scene selection mode. Pressing 1-6 will display SC-1--SC-6, indicating that the scene is 1-6. Press the UP and DOWN keys to adjust the brightness of the lamp.
Long press the OFF key to enter the area setting mode. Long press will enter the default 1 area code (for example, 1001 means area 1 of area code 1). Press the UP key area will increase, press the DOWN key area will decrease (1-127 adjustable). When you have adjusted the area, press the 6 key to save the set area and enter the next area code (for example the area you adjusted is 1003, and you press 6 to save, it will display 2002. 2 area 2 area code. He means to Tell you, you need to set the area in the 2 area code. There are 9 area codes in total. The significance of the 9 area codes is that if you set up the 3 areas in the 1 area, but you want to change lane 6 immediately, then you only need to Just call another area code) If you don’t want to set the area in another area code, you only need to long-press the OFF key (OFF key means to exit the current setting and save the set area). This will return to the scene selection mode.
Installation Notes
1. Use the "*" screwdriver to fix the iron frame to the wall as shown in the figure;
2. As shown in the figure: press the touch panel directly into the iron frame and fix it.
Typical applications
Precautions
1. Connect the load cable first, and then the power cable; make sure there is no short circuit between the input and output cables before powering on.
2. The controller's power supply voltage range is DC12 ~ 24V, and exceeding the voltage range may burn the controller.