

| Availability | In Stock |
|---|---|
| Condition | Brand New |
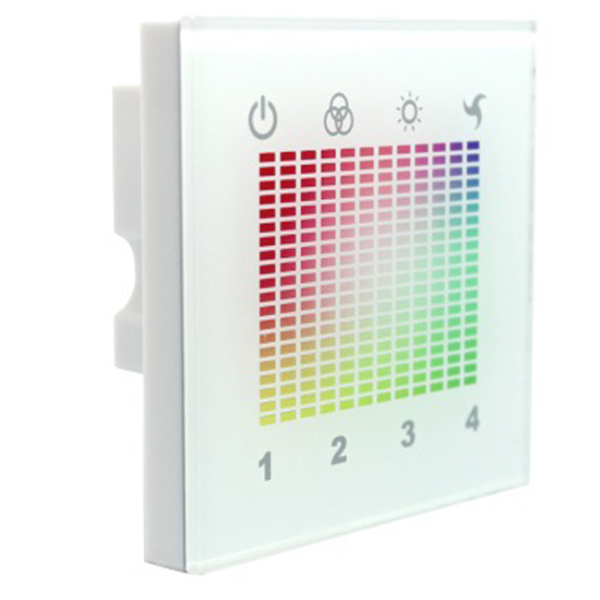
TM03 DMX touch panel controller is a new type of high-end controller newly developed by our company. It adopts glass panel design and has a beautiful and fashionable appearance. The use of a high-precision capacitive touch control chip increases the sensitivity of touch and reduces false triggering. It is used to control all kinds of DMX lamps; it has the advantages of convenient wiring and simple use; it can achieve light changes such as jumping, gradual change, strobe, and so on.


Technical Parameters
Working temperature: -20-60℃
Supply voltage: DC12-24V
Output: DMX signal
Connection mode: DMX standard three-wire connection
Dimensions: L86xW86xH36mm
Packing size: L110xW110xH56mm
Net weight: 185g
Gross weight: 240g
Static power: <1W
Specifications Download 
External Dimension

Instructions for use

① Output: D- ② Output: D+ ③ Output: GND ④ Input: V- ⑤ Input: V+
Description of the buttons on the panel
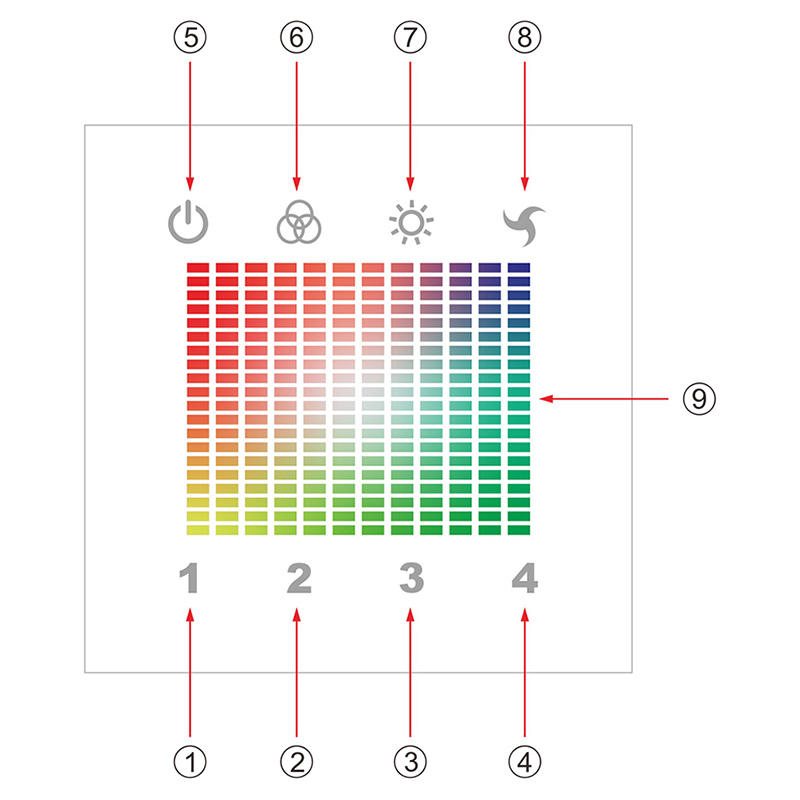
① Press to select the first group for control (ie DMX decoder address is 1~128)
② Press to select the second group for control (ie DMX decoder address is 129~256)
③ Press to select the third group for control (that is, the DMX decoder address is 257~384)
④ Press to select the fourth group for control (ie DMX decoder address is 385~512)
⑤ Control the switch of the current group
⑥ Control the current group mode (a total of 21 modes, key cycle mode 1~21~1)
⑦ Control the brightness of the current group (a total of 100 levels, key cycle brightness level 1~100~1)
⑧ Control the speed of the current group (100 levels in total, key cycle speed level 1~100~1)
⑨ Select the currently pressed static color of the current group
The standard change function is shown in the following table:
|
No |
Patterns |
Remarks |
No |
Patterns |
Remarks |
|
1 |
Static red |
Brightness is adjustable,Speed is unadjustable. |
12 |
Red stroboflash |
Speed and Brightness are adjustable |
|
2 |
Static blue |
13 |
Blue stroboflash |
||
|
3 |
Static purple |
14 |
Purple stroboflash |
||
|
4 |
Static green |
15 |
Green stroboflash |
||
|
5 |
Static yellow |
16 |
Yellow stroboflash |
||
|
6 |
Static cyan |
17 |
Cycan stroboflash |
||
|
7 |
Static white |
18 |
White stroboflash |
||
|
8 |
Three-color jumpy changing |
Speed and brightness are adjustable |
19 |
R/B crossfade |
Speed and brightness are adjustable |
|
9 |
Seven-color jumpy changing |
20 |
B/G crossfade |
||
|
10 |
Three-color gradual changing |
Speed and brightness are adjustable |
21 |
G/R crossfade |
|
|
11 |
Seven-color gradual changing |
|
|
|
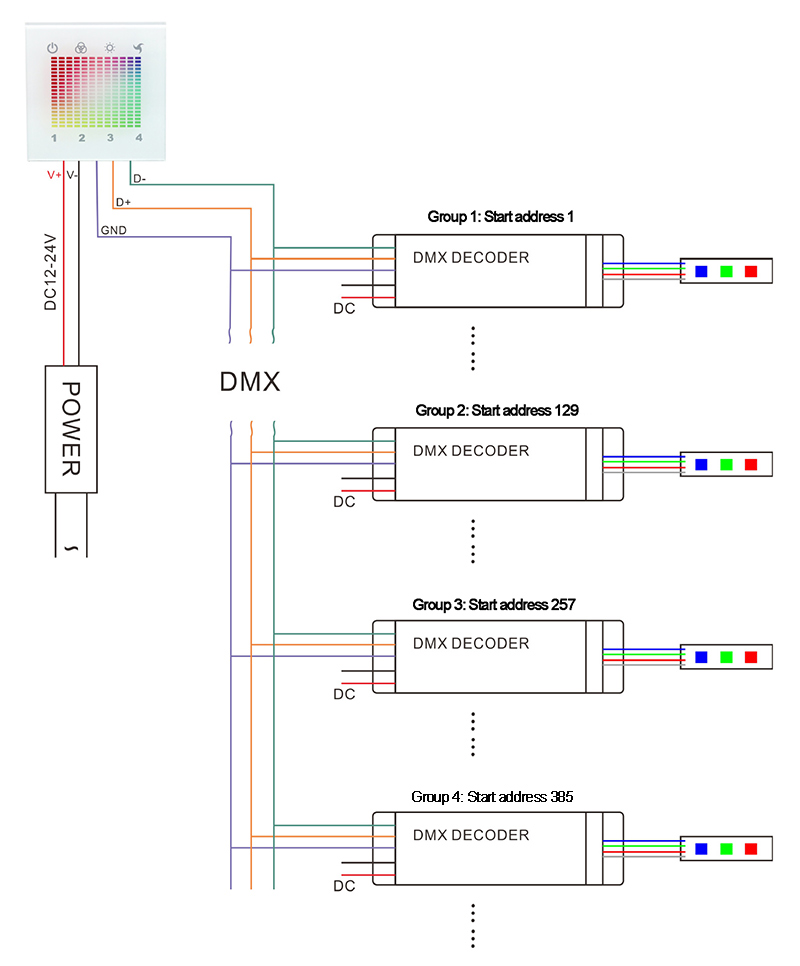
Typical Application
Installation method
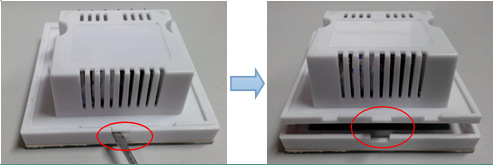
② Remove the cable. Slowly pull the lock of the terminal block and remove the cable, as shown in the following figure:
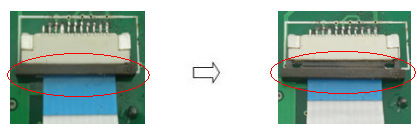
2. Wiring
Wiring according to typical application circuit.
3. Install the base
As shown in the figure, after connecting the wires, install the touch controller in the wall cassette, then screw on it to fix it on the wall, and install the base on the wall.
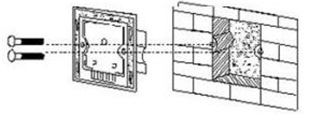
4. Cover the touch panel
Follow the steps to connect the cable, tighten the cable lock, and cover the panel.
Precautions
1. Connect the load cable first, and then the power cable; make sure there is no short circuit between the input and output cables before powering on.
2. The controller's power supply voltage range is DC12 ~ 24V, and exceeding the voltage range may burn the controller.