

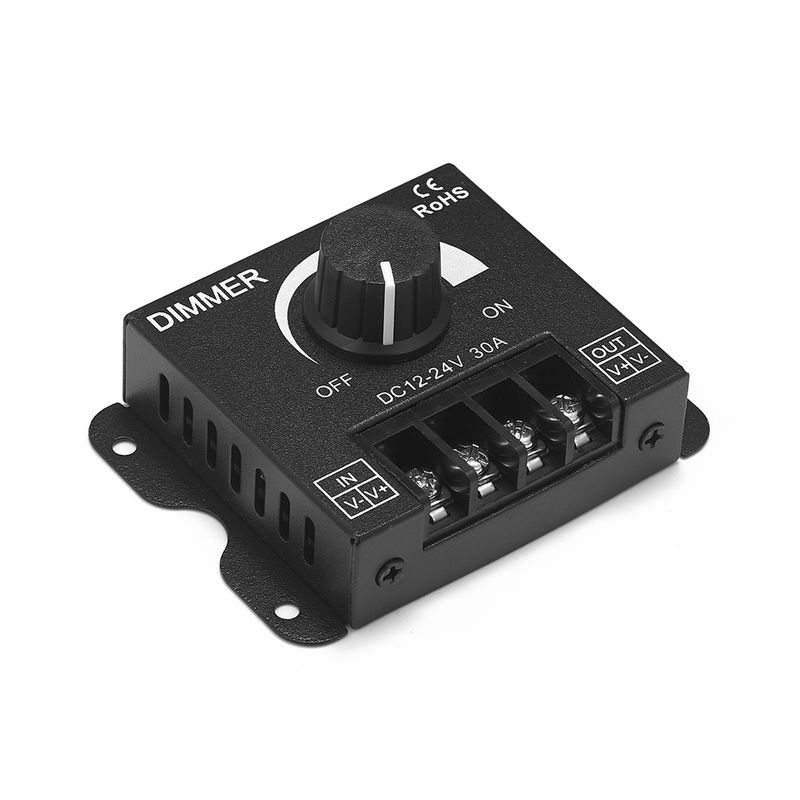
| Availability | In Stock |
|---|---|
| Condition | Brand New |
Mechanically turn the dimmer button, you can turn the knob on the dimmer to adjust the brightness of the lamp from 0% to 100%, the frequency of the dimmer is around 1,000, so it is only used for home lighting, if you use For photography lighting, please choose a dimmer with a frequency higher than 20000, such as model V1-K
How to Use: Firstly connect the load wire, following by the power wire; Please ensure short circuit can not occur between connecting wire before you turn on the power. When detected someone comes, the light turns on, after people left 10 seconds later, the light turns off automatically. And the right control signal output line and input line should connect correctly.
Standards and Certifications


Working Temperature: -20-60℃
Power Supply Voltage: DC12-24V
Output: 1 Channel
Connection Method: Gongyang
Dimensions: L81.5ΧW64ΧH40 mm
Packing Size: L90ΧW72ΧH50 mm
Net Weight: 140g
Gross Weight: 235g
Static Power Consumption: <1W
Output Current: <30A (PWM is greater than 1KHZ, the maximum output current will be reduced accordingly)
Dimensions

Interface description

①: Power input V-; ②: Power input V+;
③: load output V+; ④: load output V-;
⑤: The red light is the power indicator; ⑥: The green light is the output indicator;

①: PWM frequency selection dial code: ① in the box, 1-3 dial code, ① PWM frequency in the box is 300HZ;
②: Select the dialing code for the dimming curve: ② within the box, dial 4-5; ② The curve within the box is 1 (linear);
Instructions for use
1.Function Description:
|
Dial code 1 |
Dial code 2 |
Dial code 3 |
PWM |
|
0 |
0 |
0 |
300HZ |
|
1 |
0 |
0 |
500HZ |
|
0 |
1 |
0 |
700HZ |
|
1 |
1 |
0 |
1KHZ |
|
0 |
0 |
1 |
3KHZ |
|
1 |
0 |
1 |
5KHZ |
|
0 |
1 |
1 |
10KHZ |
Dimming curve selection:
|
Dial code 4 |
Dial code 5 |
Curve |
|
0 |
0 |
1 |
|
1 |
0 |
3 |
|
0 |
1 |
2 |

2. Wiring instructions:
Connect the load line first, and then the power line; make sure there is no short circuit between the connection lines before powering on;
Using rotary control, the functions are as follows:
When the knob is turned to the right, the brightness gradually becomes brighter, and when turned to the far right, the brightness is the largest.
When the knob is turned to the left, the brightness gradually becomes darker, and when turned to the far left, the light turns off.
Typical application

Installation method
Connect the corresponding wires according to the interface instructions, taking care not to reverse the wires;
Precautions
1. Connect the load cable first, and then the power cable; make sure there is no short circuit between the input and output cables before powering on.
2. When the PWM frequency is 300Hz and the maximum load is 30A, the controller temperature is less than 55℃; when the PWM is 500Hz-1000Hz, the controller temperature is less than 65℃;
3. The load power of PWM decreases when the frequency is greater than 1KHz. The load is 20A at 3KHz; 15A at 5KHz; and 10A at 10KHz.