| Availability | In Stock |
|---|---|
| Condition | Brand New |
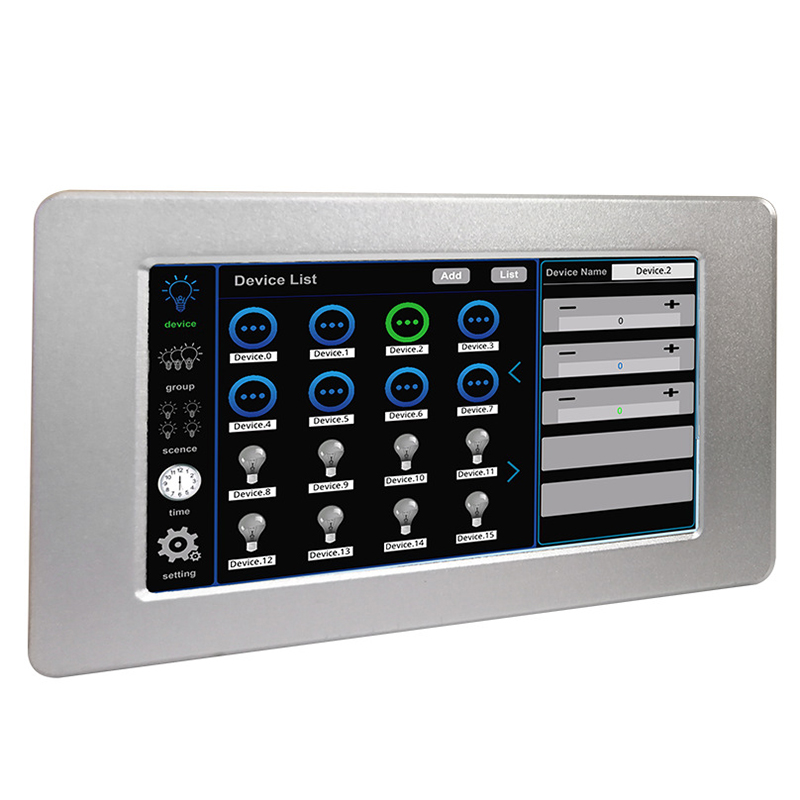
DMX touch screen main control is a light controller based on an intelligent system. The touch screen adopts the current popular capacitive touch technology and uses the software to virtualize the metal texture control panel. The software is simple to operate and the user-defined settings are easy. Convenient and fast to achieve diverse lighting control effects.


Technical Parameters
Working Temperature: -20 to 70℃
Power Supply Voltage: 12V (error ± 0.2V), 1A
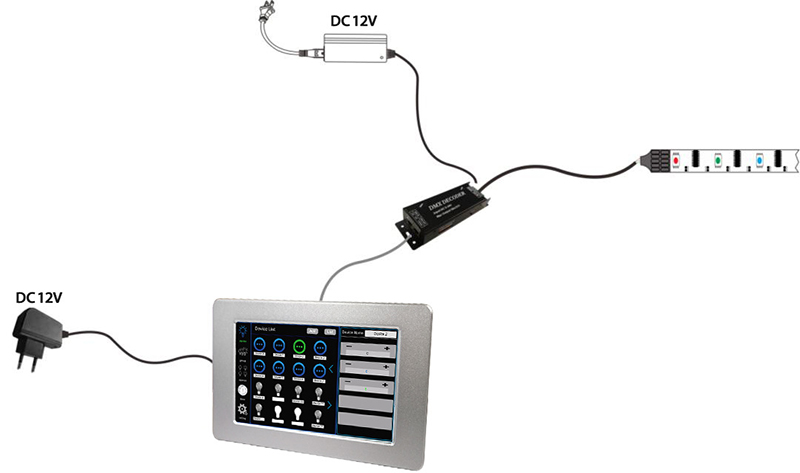
Output: Primary DMX signal (add up to 64 DMX 1 to 5 loop lighting equipment)
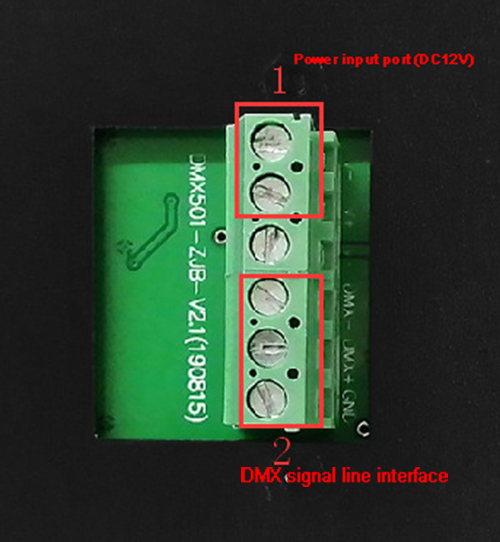
Connection Method: DMX signal line
Packing Size: 245*165*60mm
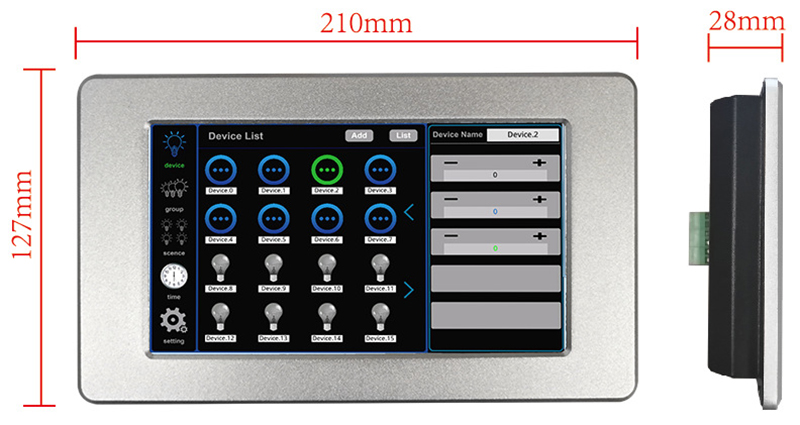
Dimensions: 210mm*127mm*45mm
Net Weight: 721g
Gross Weight: 1050g
Maximum Power Consumption: 12W
External dimension
Interface description
Function introduction
System function area introduction
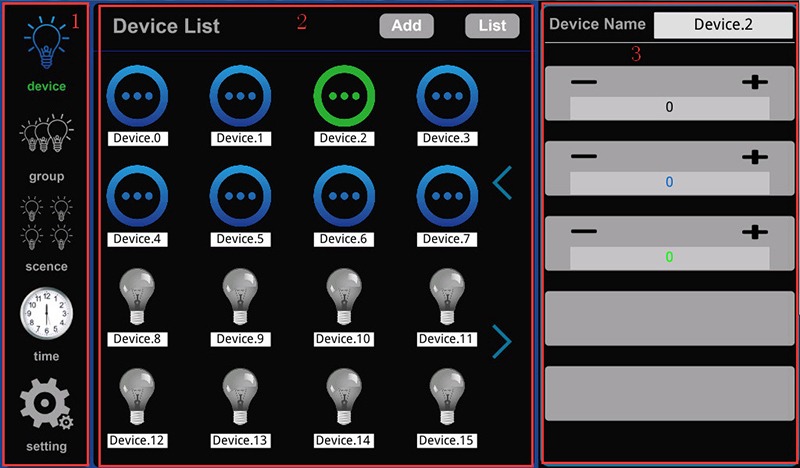
The system has three major areas, as follows:
System menu (reference number 1 shown in Figure 1): contains five function buttons: device, group, scene, timer, and setting.
Content panel (label 2 shown in Figure 1): display device information (number of devices, device name), group information (group name, group picture), scene information (scene name, scene picture), timer information, settings Information (brightness adjustment, local restart, local data reset to factory state, lock screen password setting, screen time).
Attribute panel (reference number 3 shown in Fig. 1): display device attribute, group attribute, scene attribute information.
Software function introduction
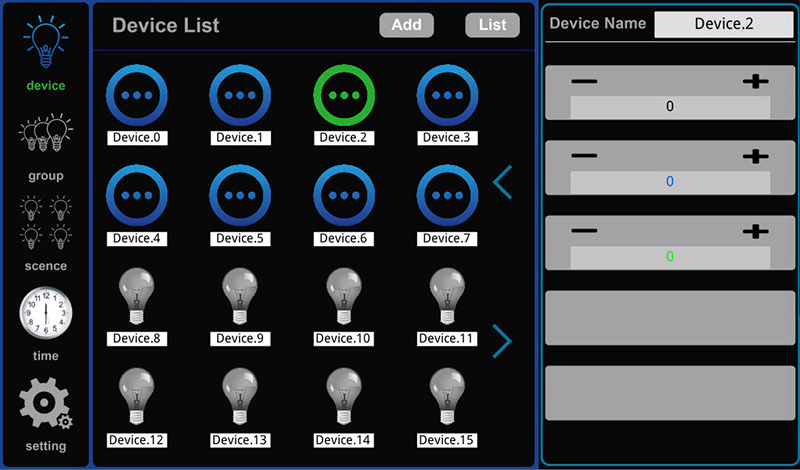
device control: select a terminal device to control, such as controlling the brightness of the light.
Group control: select a group to add or remove devices, and control the brightness of the devices in the group as a whole. When performing group control, the brightness of the devices in the group will become the same.
Scene control: select a scene to add or remove the device, the brightness of the scene device can be different, more flexible than group control, the scene can be applied to the timer
time timer: select a timer to set (time, scene name), after the timer starts, the corresponding scene will be executed at the set time. All timers can be turned on or off at the same time, or a timer can be turned on or off individually.
Setting: brightness adjustment; restart the machine, click to restart immediately, no prompt; the machine data will be restored to the factory state (a password will be required, which can be the default password (686890) or a user-defined password); lock screen password; Breath time (in seconds).
Introduction to software operation
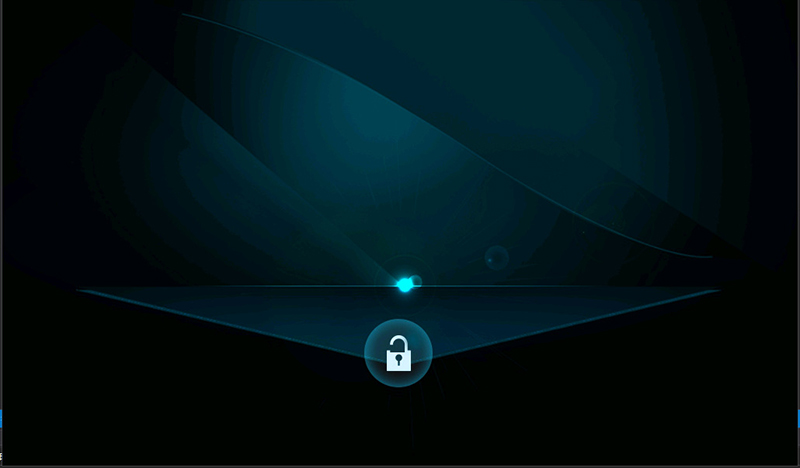
You need to click the lock button (as shown in Figure 2) in the interface to enter the unlock password to enter the user interface. The unlock password can be the initial password (686890) or a user-defined password. After entering, press back Confirm by pressing the key; if the password is empty, click the enter button.
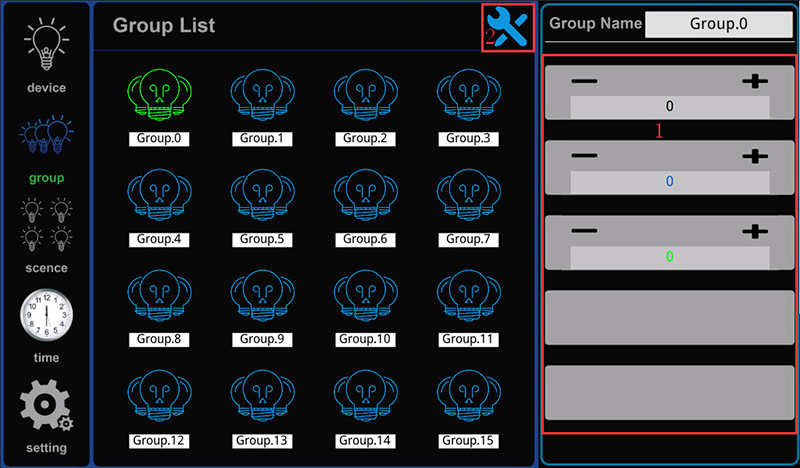
group is the group page, click the "group" button to enter the group page, as shown in Figure 6.
"Group name" shows the group name of the currently selected group (the group icon is displayed in green after the group is selected, and the currently selected group can be renamed here); the red box 1 is the brightness adjustment area, which can be passed through "+" And "-" buttons to fine-tune the brightness of the currently selected group, or you can adjust the brightness of the currently selected group through the slider; box 2 is the button to enter the group configuration page. When the group is selected, click this button to enter the group configuration page.
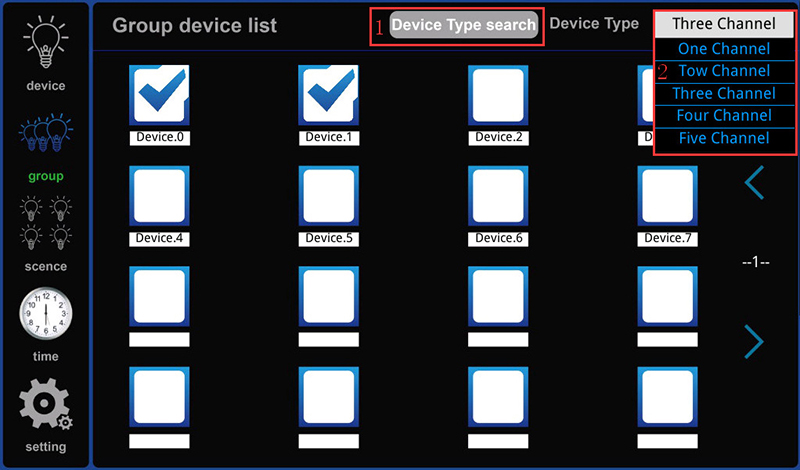
In the group configuration page, the device can be added to the currently selected group. undefined means that the device has been added to the currently selected group. undefined means that the device has not been added to the currently selected group. "Device Type" shows the device type of the currently selected group. The red box 1 on the page shows the device type selection. After clicking, the device selection list in box 2 will pop up. The small blue arrow on this page can also turn the page. After the operation is completed, click the "group" button to return to the group page.
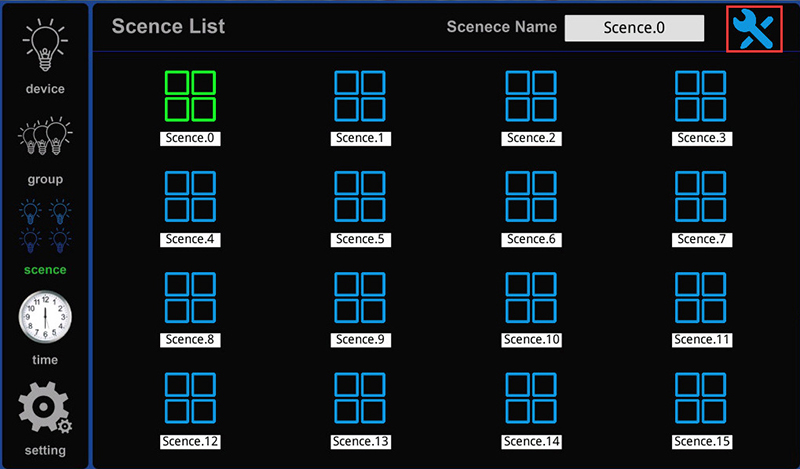
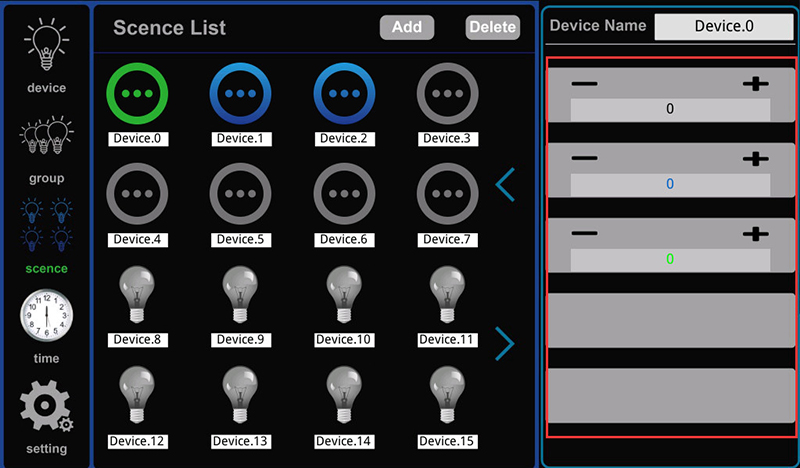
scene is the scene page, click the "scene" button to enter the scene page, as shown in Figure 8.
Click the button in the box in Figure 8 to enter the scene configuration page, "scene name" shows the name of the currently selected scene, and you can also rename the currently selected scene here (if the scene is selected, the scene icon will be Turns green; blue if unselected).
Click "ADD" and "Delete" in the scene configuration page to add or delete the device in the currently selected scene (as shown in Figure 9). If the device has been added to the current scene, the device icon will be displayed in blue; If it is not added to the current scene, the device icon will be gray. Click the gray device icon and then click Add to add the device to the current scene, and the color of the device icon will change from gray to blue. Similarly, click the blue device icon and then click Delete to delete the device from the current scene.
The "Device name" in the scene configuration page shows the name of the currently selected device in the current scene (the selected device icon is displayed in green). The red box in Figure 9 is the device brightness adjustment area of the currently selected scene. The two buttons "+" and "-" fine-tune the brightness of the device in the currently selected scene, or you can adjust the brightness of the currently selected group through the slider. The small blue arrow on this page can also turn the page. After the operation is completed, click the "group" button to return to the group page.
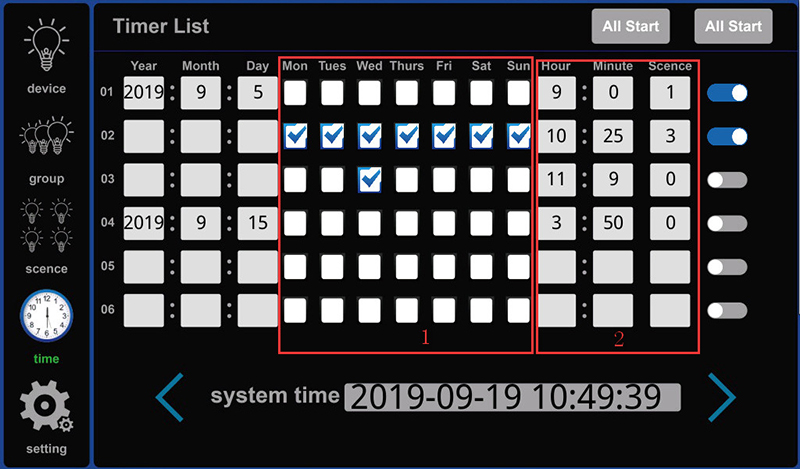
Time is the timer page. Click the "time" button to enter the timer page, as shown in Figure 10.
The "Year", "Month" and "Day" options on the timer page are filled in the year, month and day. If the year, month and day are filled in, the week option cannot be selected for the date in the same set of timers (box 1 is the week option); Similarly, if the week option is checked, the date in the same group of timers cannot be selected to fill in the year, month and day. Box 2 is the time when the timer needs to be triggered and the scene selection that needs to be triggered.
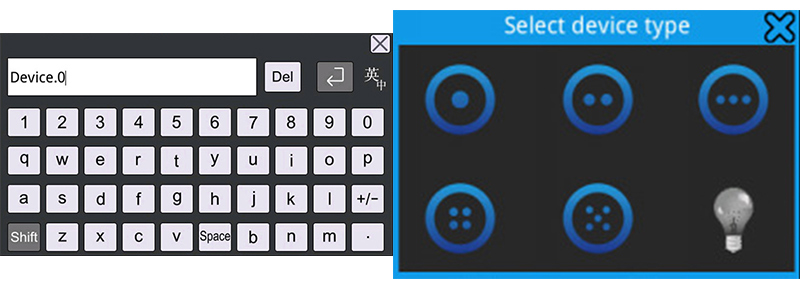
The "undefined" button is a timer switch. When the button is blue, the timer is turned on (if the trigger date is the year, month, and day, the timer is triggered once, and if the week is satisfied, the adjustment can be triggered), and the gray is not turned on. The "system time" at the bottom of the page shows the system time. The blue arrows on the left and right sides of the system time are the page-turning buttons of the timer page. You can turn the timer page (24 timers in total). At the same time, long-press here to modify the system time. If you do not need a timer option, you can clear the option, select the option that needs to be cleared, click the box below the option to pop up the page in Figure 9, and choose Enter. “All On” and “All Off” are all on/off timer buttons.
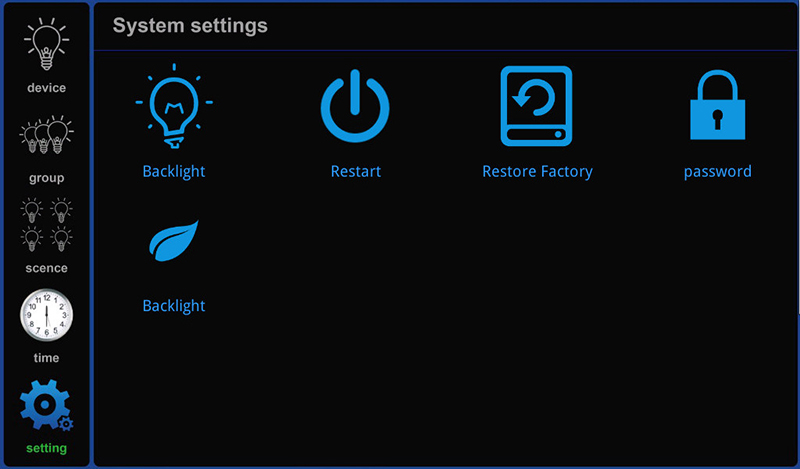
Setting is the system setting page. Click the "setting" button to enter the system setting page, as shown in Figure 10.
The "Backlight" icon is the brightness adjustment button of the local user interface.
The "Restart" icon in the local system restart button. It will automatically restart immediately after being clicked, and no prompt will appear.
The “Restore Factory” icon is a button to restore the factory settings (the machine data is restored to the factory state). After clicking it, a password will be required. The password can be the default password (686890) or a user-defined password. If the password is entered incorrectly, nothing will happen on the interface after clicking the confirm button. If the password is entered correctly, the setting interface will return after clicking the confirm button.
The "password" icon is a password setting button. If the user needs to change the password, he can click this button to modify it.
The “Screen time” icon is a breath-hold time button, which can be dimmed to set the breath-hold time of the unit (time unit in seconds).
Typical application