This article introduces the related wiring knowledge of LED COB light strips, so as to avoid you being overwhelmed when you encounter the same problems during the installation.
Fast Article Guide:
- How To Cut COB LED Strips?
- How To Connect COB LED Strips After Cutting?
- How To Choose The Right Solderless COB LED Connector?
- How To Power COB LED Strip Lights?
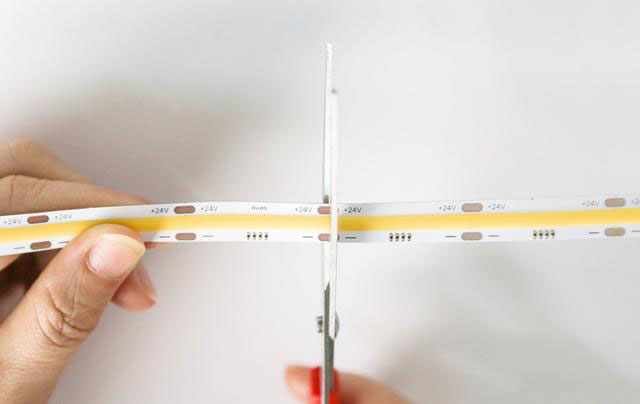
How To Cut COB LED Strips?
There are only two points to pay attention to when cutting COB led strip lights.
One is to align the cutting line. The COB led strip is composed of multiple circuits in parallel, so the failure of one circuit will not affect other circuits. Each clipping region is a loop.
For example, you can cut 12 COB led lights for a 12V COB led light strip at a time, and these 12 COB lights are a series circuit (Chip On Board technology makes the led strip integrate more LED chips).
Therefore, if you cut to the led COB lights loop, the loop will be damaged and the led COB lighting will not light up.
The second point is to be neat when cutting, don’t cut it crookedly, because this is also likely to cut the loop and you will lose a section of COB LEDs.
How To Connect COB LED Strips After Cutting?
In the LED project, I got an appropriate installation length after cutting, but the COB led lighting strip after cutting has no wires to connect the led controller and power supply, or I don’t know how to connect another COB led strip light together, what should I do? At this point, you can use solderless COB led connectors or choose to solder.
2.1. How to connect two COB led strips together through a solderless connector?
- First, insert the two COB led strip segments into the COB led connector.
- Aalign the positive and negative poles, make sure that the metal piece of the COB led connector is aligned with the strip solder joint.
- Press the metal piece to make it close to the solder joints to establish an electrical connection.
- After completing COB led strip light connection, power on to test if the COB led lights can light up.
When encountering obstacles during led COB light installation, the installation path is not straight, you can use the jumper cable connector to easily jump over obstacles like the bump on the plank. The COB light led strip cannot be installed at a 90-degree angle, which will damage the light strip PCB board. When encountering a corner, it is recommended to use a corner connector. T-connectors can be used to connect multiple COB led light strips.
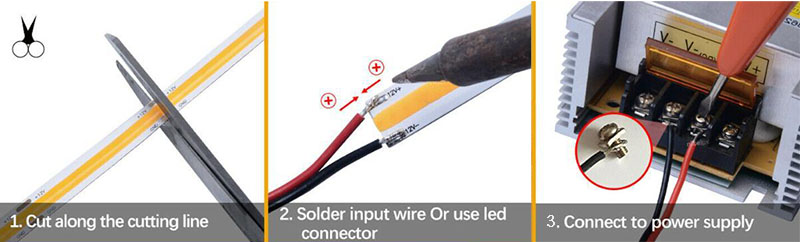
2.2 How to connect the COB led strip to the power supply after cutting?
If you are using a switching power supply, prepare a wire-to-board connector, and connect the COB led light strip and bare wires according to the above method. The board-to-wire cable is used to connect the light strip to the desktop power supply. Of course, you can also solder a piece of the bare wire to the strip.
2.3 How to solder COB led strip lights?
Welding COB led strips requires a certain basic operating ability. When using an electric soldering iron to solder the COB led light strip, please pay attention to the following aspects:
- Pay attention to ventilation when welding.
- Solder wire contains a certain amount of heavy metal lead, which is harmful to the human body. Wear gloves when handling or wash hands after handling.
- Do not touch the soldering iron tip with wires and other sundries to avoid burns or electric leakage.
- The soldering iron tip needs to be raised to a certain temperature before it can be operated.
- Do not solder on metal pads, because the heat dissipation effect of the metal is good, and the soldering temperature will not rise.
Step 1. Prepare soldering items: Soldering iron, COB led light strip, led power supply, a bare wire, tin.
Step 2. Heat the soldering iron tip.
Step 3. Connect the COB led tape to the led driver: add tin to the bare wire, align the bare wire to the solder joints of the COB led strip, and use a soldering iron to heat the tin of the bare wire and the solder joints to melt and combine.
Solder two COB led strips together: Align the solder joints of the two COB led light strips, add tin to all the solder joints, and the electric soldering iron melts the solder joints. After the solder joints are cooled, the electrical connection can be established.
Step 4. After the welding is completed, you can gently pull to test whether the welding is firm.
How To Choose The Right Solderless COB LED Connector?
The width of the COB led strip connector needs to match the width of the COB led light strip. It is not feasible for a 10mm COB led connector to connect to an 8mm COB led strip. In addition, pay attention to the pinpoint of the COB strip.
Use 2pin connectors for single color high CRI 95+ COB led light strips, 3pin for CCT dimming COB led strips and addressable COB led strip lights, 4pin for RGB COB led strip lights, 5pin for RGBW COB led strips, and 6pin for RGBCCT COB led strips.
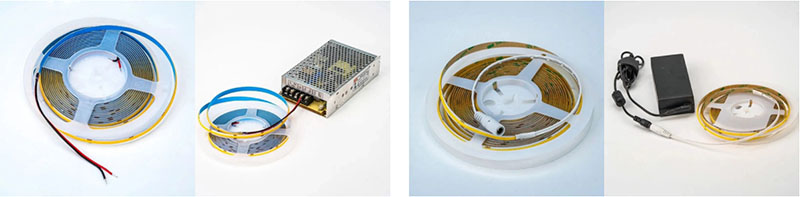
How To Power COB LED Strip Lights?
The single color COB led strip can be directly connected to the led transformer, or connect the COB led light strip to the led controller and power supply, it is all up to you.
COB led strip lights installation is completed by adhesive backing or mounting clips, for detailed COB led strip knowledge, you can click here to know more.
COB led strip light wiring: