
How to make led neon lights?
An LED neon light is an LED strip inside a silicone neon tube. To make one:
- Match the tube to the strip: the tube’s inner width is the same as the strip’s PCB width, or wider. Any LED strip can wear a neon tube, including RGB and addressable strips.
- Thread the strip in: peel off the strip’s adhesive, straighten both, tie the traction line inside the tube to the strip’s end wire and pull the strip through. Over 3 m, use an air gun.
- Seal and mount: pass the wire through the end cap hole, cap both ends and seal them with adhesive or heat-shrink tubing, then fix the neon with aluminum clips or a profile.
Can you cut LED neon rope light? Yes, but only at the cut marks, which you see through the translucent line on the side of the tube, and every cut end must be capped and sealed.
At SuperLightingLED we make both halves of a DIY neon light, the LED strips and the silicone neon tubes they go into, as well as ready-made LED neon strip lights. This guide covers the parts you need, how to cut neon without ruining it, how to thread a strip into a tube, and how to build a sign from it.
Led neon rope lights are widely used in the lighting industry, and they can be seen basically in the street or in life. All led strip lights can use neon silicone tubes to make led neon lights.
Traditional neon lights will encounter problems when the pattern font is too large or too small. However, the neon led strip can be cut to any length and bent into different shapes when installing, which is very convenient to install with different material surfaces, such as wood, plastic, steel or walls. At the same time, it can be designed and decorated into different patterns according to the needs of the designer.
You can use led neon lights in pools, fountains, and beaches, because led neon rope lights are very waterproof. It can also be used for advertising signs and holiday decorations in restaurants, bars and other places. The neon led strip lights are highly flexible which can be fixed in rugged and uneven places and can use neon led strip lights to make various shapes and patterns flexibly. It can also be used to outline lines and brighten contours. Any angle, any place, and any theme can realize your creativity with neon led strips.
How to make led neon signs or DIY? You need to know and can’t miss the following knowledge.
If you want to learn led neon lights, please read:
DIY LED neon lights: what you need
A DIY neon light (sometimes called separated neon: the strip and the tube are bought separately) needs only a few parts:
| Part | What it does | Shop |
|---|---|---|
| LED strip | The light source. Any LED strip that works normally can wear a neon tube: single color, RGB color changing or addressable dream color strips. | single color · RGB · addressable |
| Silicone neon tube | Protects the PCB and diffuses the light: a light-shielding surface and a diffusion surface. Inner width = PCB width, or wider. | silicone neon diffusers |
| Traction line | Left inside the tube; tie it to the strip’s end wire and pull the strip through. | Comes inside the tube |
| Air gun | Only for tubes over 3 m: blows the strip and traction line to the far end. | Your own tool |
| Sharp scissors | One clean cut at the cut mark. Groove scissors cut at any angle from 45 to 135 degrees. | angle cutting scissors |
| End caps, adhesive, heat-shrink tubing | Close both ends so water cannot enter the connection; the power-side cap has a hole for the wire. | neon end caps |
| Clips or profile | Fix the finished neon with screws and aluminum clips, or lay it in an aluminum or flexible profile. | aluminum clips · aluminum profiles |
| Power supply | Same voltage as the strip; the letters of a sign are wired in parallel to one supply. | LED power supplies |
Which silicone neon tube fits my LED strip?
Measure the width of your strip’s PCB and pick the tube with the same inner width. A tube wider than the PCB also works; a narrower one does not fit. If the width does not match, they are not a good pair.
| LED strip PCB width | Silicone neon diffuser |
|---|---|
| 3–4 mm | 3-4mm silicone neon diffuser |
| 5 mm | 5mm/0.20in silicone neon diffuser |
| 6 mm | 6mm/0.24in silicone neon diffuser |
| 8 mm | 8mm/0.31in silicone neon diffuser |
| 10 mm | 10mm/0.39in silicone neon diffuser |
| 12 mm | 12mm/0.47in silicone neon diffuser |
| 14 mm and wider | 14-30mm silicone neon diffuser |
Tube styles: black LED neon silicone diffusers, 360 degree round diffusers, top emitting and side emitting.
How to cut led neon lights?
Led neon ropes are widely used in pattern decoration and lighting due to their flexibility and high light transmittance. Whether you want to use neon flex led strips to decorate your house or use it for lighting, cutting the led neon rope light properly and safely is an essential part in the process of using led neon lights. Learning how to cut led neon ropes correctly can add an important skill to you. Now let’s take a look at how to cut neon led strip lights.
►Step 1. Find the cut marks. Spread the neon lights horizontally on the table, don’t bend it.
You can see the cut line of the light strip through a translucent line on the side of the neon tube.
►Step 2. Use a sharp scissor or other tools to cut the neon led strip.
Since the led neon tube has a certain height, it should be cut cleanly and not unevenly. Don’t put too much pressure on it. Silicone is very soft. If you find it difficult, maybe is your scissors not sharp enough.
Led neon rope lights can be cut in different angles. If you have the demand, there are professional precise cutting groove scissors you can use to cut at an angle from 45 degrees to 135 degrees.
►Step 3. After cut, cover an end cap with silicone or adhesives.
Wait for the adhesive to dry before putting it into use. Dry the adhesive naturally or use a hair dryer to speed up drying.
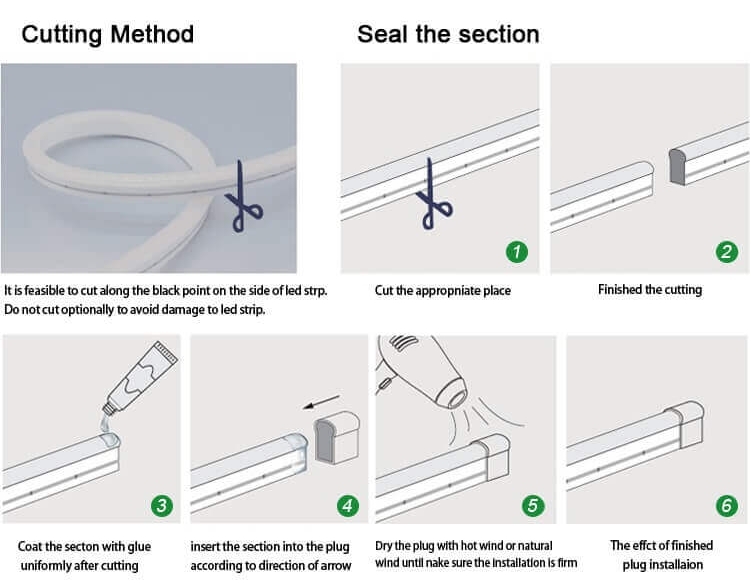
In this way, cutting an led neon rope light isn’t difficult. You just need some knowledge and operating skills. Not confident in your skills? Practice more, and you will become like a professional.
Can you cut LED neon rope light? The cutting rules at a glance
Yes. LED neon strips and neon rope lights can be cut to length, but only at the cut marks of the LED strip inside. Five rules cover every cut:
- Cut only at the cut marks. You see them through the translucent line on the side of the neon tube; on a DIY tube, peel off the strip’s adhesive first or the line stays hidden.
- Lay it flat and straight. Spread the neon horizontally on a table and do not bend it while you cut.
- One clean cut. Sharp scissors, no heavy pressure: the silicone is soft. For angled joints, groove scissors cut from 45 to 135 degrees.
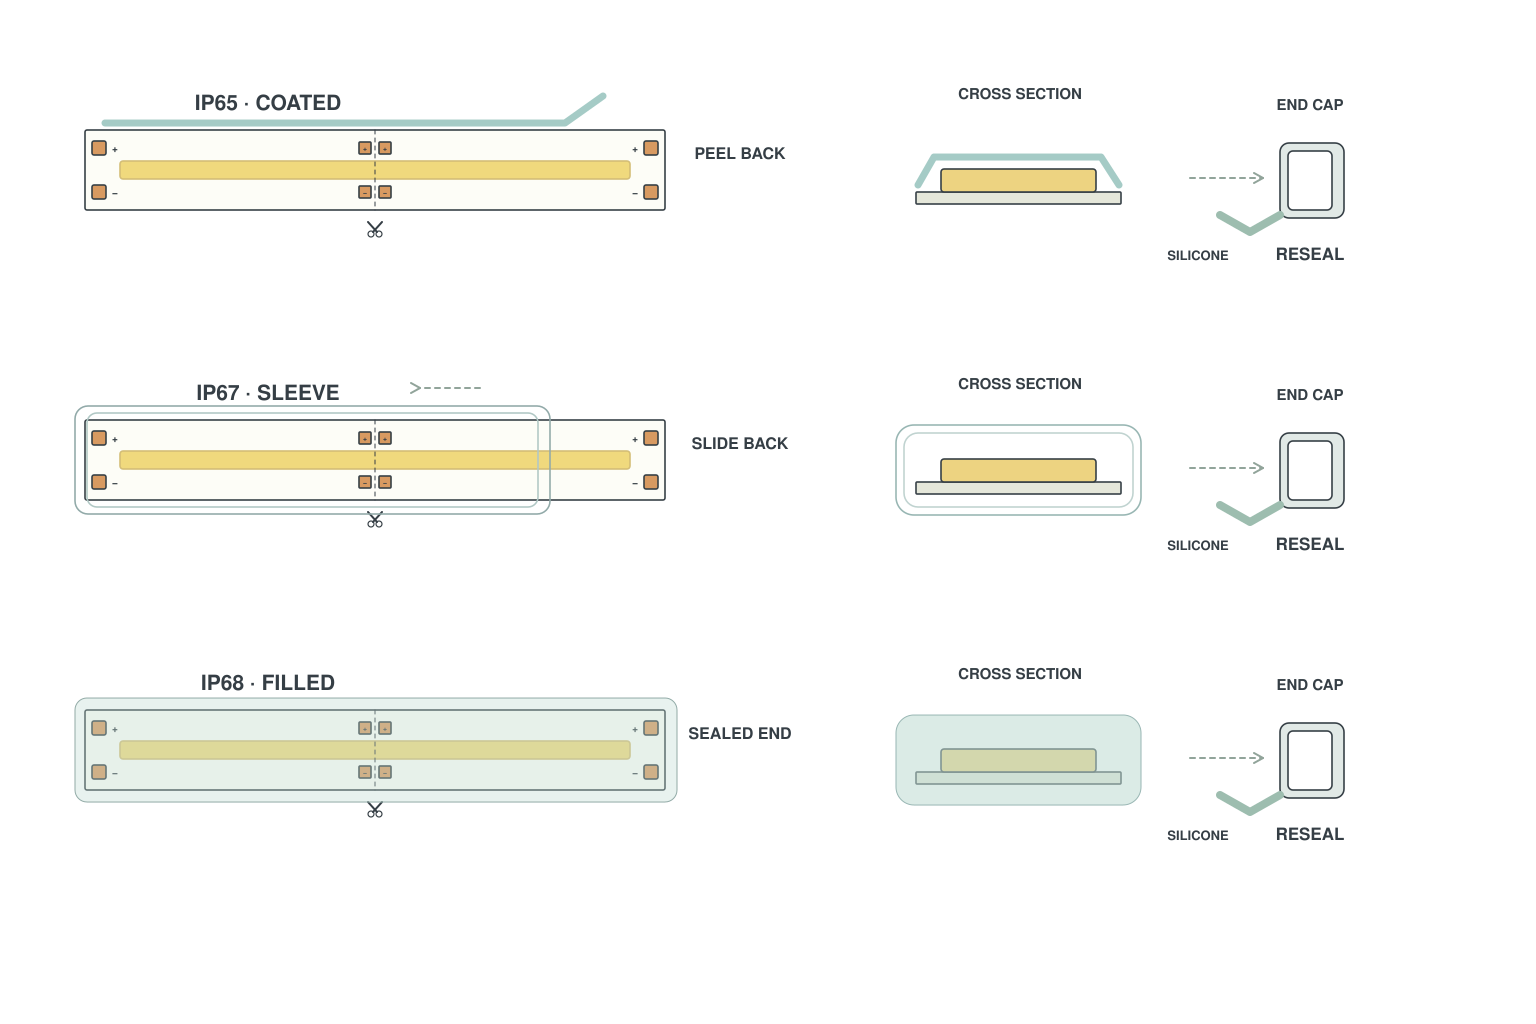
- Seal the new end. Every cut on a waterproof LED strip is a new joint: cover it with an end cap and silicone or adhesive, and let it dry before use (a hair dryer speeds this up).
- Cut carefully. Two cut pieces cannot be restored into one. If you must join them, solder the strips, glue the tubes and heat-shrink the joint (next section).
The same rule applies to every waterproof LED strip. Diagram from our LED strip wiring diagrams library:
Can led neon lights be connected?
When using led silicone neon tubes to make various patterns or fonts, please pay special attention to the fact that once the neon silicone tube is cut, it means that it is already an independent entity. After two segments of neon tube have been cut, they cannot be restored into one. Please cut carefully.
Soldering the light strips in the two sections of the neon tube, and connecting the neon tubes with adhesive. Put a heat-shrinkable tube on the joint of the two sections, and heat the heat-shrinkable tube. This may be a solution when you must connect the led neon rope lights.
7 easy steps to make an led neon light
Silica gel plays a role in protecting the PCB board in the led neon light, and also has a light source diffusion effect. The product structure is mainly divided into a light-shielding surface and a diffusion surface. The light refracted by the light source is transmitted through the silica gel so that it can emit light according to the customer's desire, which is more breakthrough and artistic than the traditional transparent silicone sleeve.
When the led neon rope light is produced, a traction line will be left inside the led neon tube to let the PCB board through the tube conveniently, and then it is sealed, even if an LED light is broken during the later use, you only need to replace the PCB board instead of the whole led neon light.
Most factories use this line to wind and fix the light strip and then pull it out from the end. This is a more traditional and practical method. It is more suitable for 1-3 meters long led neon silicone tube. Basically only one person is required for operation. Relatively speaking, it is easy and smooth, and there are few surprises!
►Step 1. Prepare an led light strip that can work normally and an led neon tube.
The width of the light strip needs to be the same as the width of the PCB board in the neon silicone tube or the neon tube width is wider than the PCB width. If the width does not match, they are not a good pair. Be sure to find a good neon silicone tube partner for your light strip.
All led strip lights can wear neon tubes, don’t worry about your RGB color changing light strips or addressable dream color strip lights not being able to use neon tubes.
►Step 2. Tear off and remove the adhesive on the light strip.
On the side of the neon silicone tube, there is a translucent line that you can see the cut line of the led strip. If you choose not to tear off the adhesive, you will not see the cut line and you do not know where to cut.
►Step 3. Straighten the neon tube and the light strip.
If it is not flat, it is easy to cause the light strip to bend. In this case, wearing the light strip will cause that the sharp edge of the light strip will cut the inner wall of the tube and the light strip cannot be pulled out.
►Step 4. Place the led strip with the light bead direction correctly.
Not all silicone neon tubes have the same internal structure. It includes light strip channel and light source channel. Generally speaking, the shape of the light strip channel is very similar to the shape of the cut surface of the light strip. Carefully distinguish these two channels, it is not difficult to distinguish, I believe you can do a good job. If your neon tube has only one channel, you need to be careful not to reverse the light-emitting surface of the light strip. And the light-emitting surface is milky white. Once it is anti-loaded, all the operations behind you will fall short.
►Step 5. Tie the traction line from the neon silicone tube to the led strip.
Your operation affects whether the specific part where you tie the line is the PCB board or the end wire of the led strip light. One of the hidden dangers of tying on the PCB is that during the pulling process, too much violence or the length of the pulling line will cause damage to the PCB board. If you are not sure whether your operation will damage the light strip, tie the traction line to the wire at the end of the light strip, which will hardly affect the light strip.
►Step 6. At the other end of the silicone neon tube, slowly pull out the traction line with the light strip.
If a person is not easy to operate, you can call your friends for help. Pay attention to your strength in the process of pulling the line to prevent damage to the light strip and the led neon tube or cause the traction line to loosen off.
►Step 7. After passing the led light strip perfectly through the neon silicone tube, untie the traction line, pass the wire at the end of the light strip through the end cap hole, cover the end caps at both ends, and seal it with adhesive.
It is also possible to use heat shrink tubing without adhesive. Of course, you want to use both adhesive and heat shrink tubing, which is obviously great. This greatly enhances the guarantee for your use of neon lights and reduces follow-up maintenance.
As you can see, we have repeatedly mentioned using adhesives to seal the led neon ropes. For all waterproof light strips, whether it is a led neon rope light or an ordinary waterproof led strip light, it is necessary to ensure that water does not enter the connection interface and cause problems that could have been avoided.
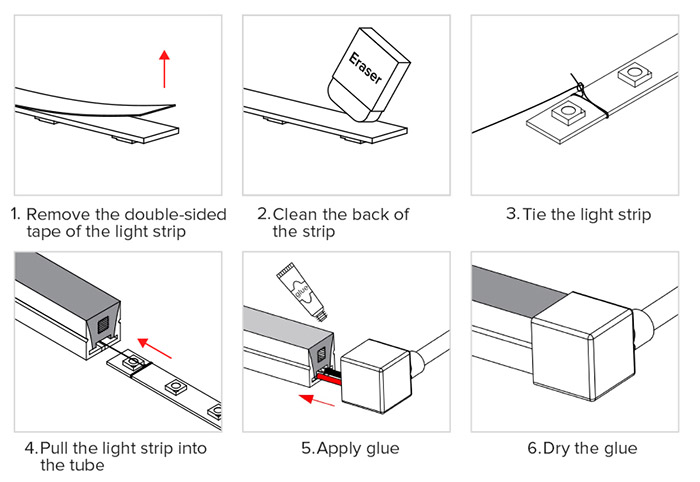
This is the way about how to wear led neon tubes for light strips under 3 meters, so what about over 3 meters? How to make led neon light when the led strip more than 3 meters?
Once the traction line in the led neon tube with a longer product length is easily broken during the pulling process, or stuck and cannot be pulled out again. This is also a problem that most factories will encounter. The key to solve the problem that the led neon silicone tube is too long to wear the led strip light is to use third-party tools---air gun.
You still need to tie the traction line to the light strip, use the air gun to aim the led neon silicone tube, press the switch, the high-pressure gas will follow the silicone tube to rush the light strip and the traction line to the end. You only need to hold the rope and pull it.
Even 5-10m, 10-30m can be operated according to this method, under the condition that the PCB strip light board and the led neon silicone tube are straight. Because the strong air pressure will push the light strip forward, and the use of air pressure can solve the problem that the led neon silicone tube is too long to wear the light strip.
DIY LED neon sign: step by step
A neon sign is several pieces of LED neon, one per letter or line, wired to one power supply. Using the steps above:
- Plan the letters or pattern. Each letter or line is one piece of neon, and each piece gets its own feed wire at its start.
- Make each piece. Thread an LED strip into a silicone neon tube with the 7 steps above, or start from ready-made LED neon flex.
- Cut each piece at a cut mark. Follow the cutting rules and cap every cut end. A cut piece cannot be joined back, so cut carefully.
- Bend it into shape. Minimum bend radius 10 cm; never bend neon flex flat-wise.
- Wire the letters in parallel. Bring every feed wire to one power supply behind the panel; the letters are wired in parallel.
- Cap and seal both ends of every piece. The cap on the power side has a hole for the wire; seal both ends with adhesive or heat-shrink tubing.
- Mount it. Screw the aluminum clips in place and insert the neon with the light-emitting surface upwards, or use an aluminum profile.
Color changing or addressable sign? Chain the pieces for data in the order you want the effect to travel, give each piece local power sized for its wattage, and set the addressable controller pixel count to the total. All pieces must use the same IC family and voltage.
Both diagrams are drawn by the SuperLightingLED engineering team; click one for the full notes.
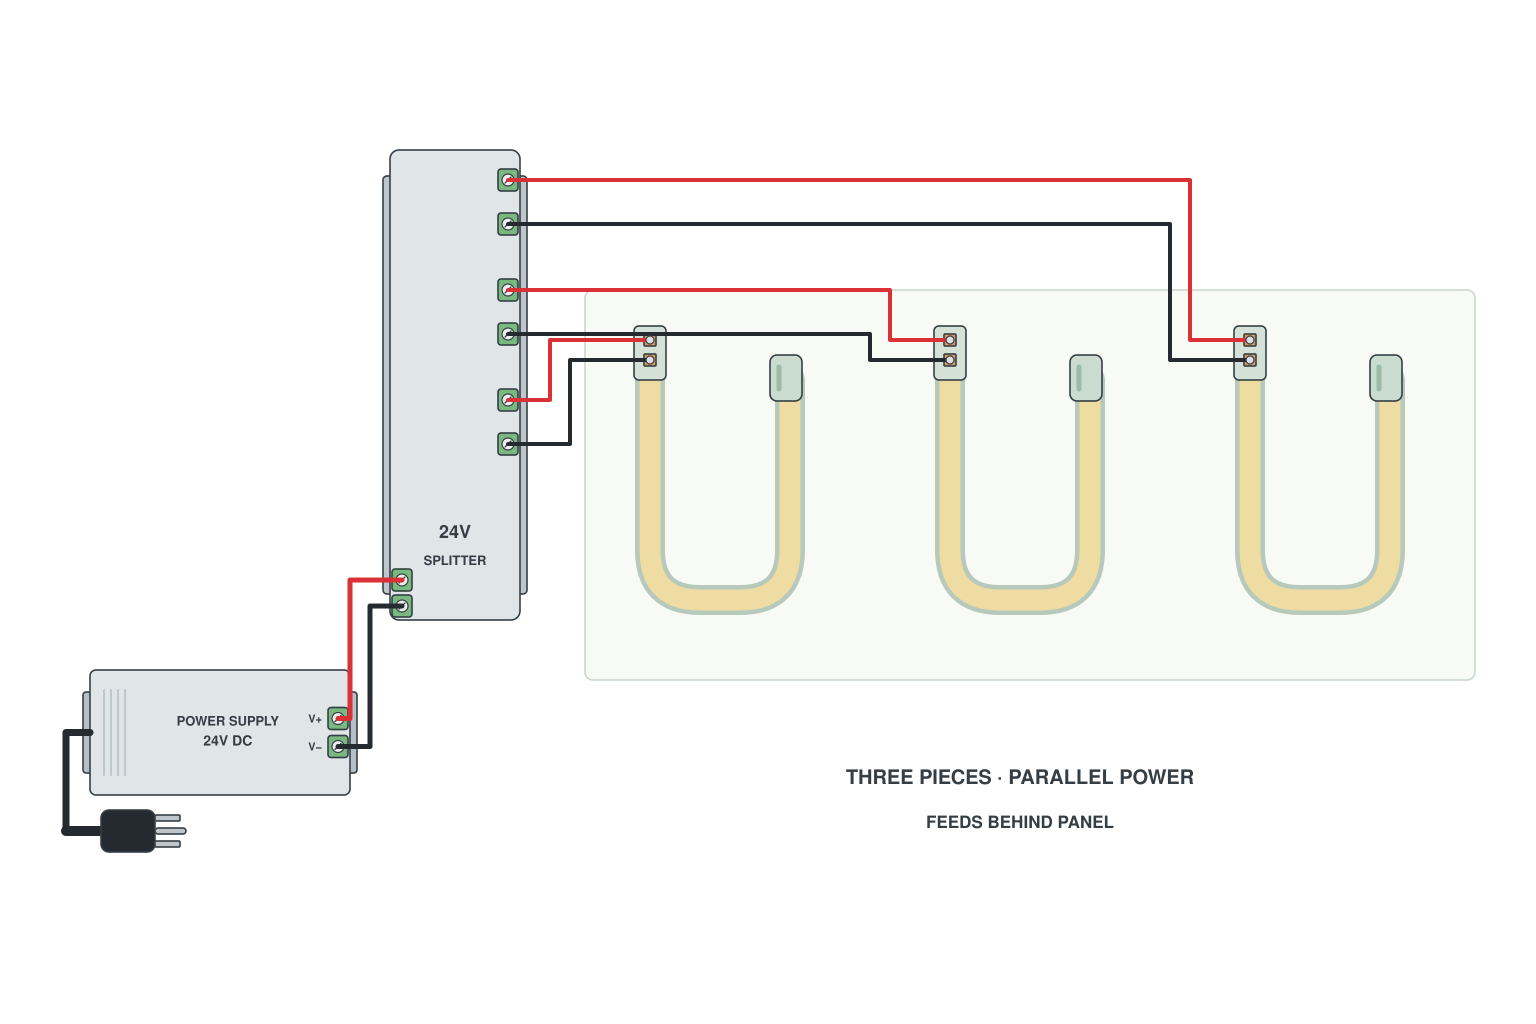
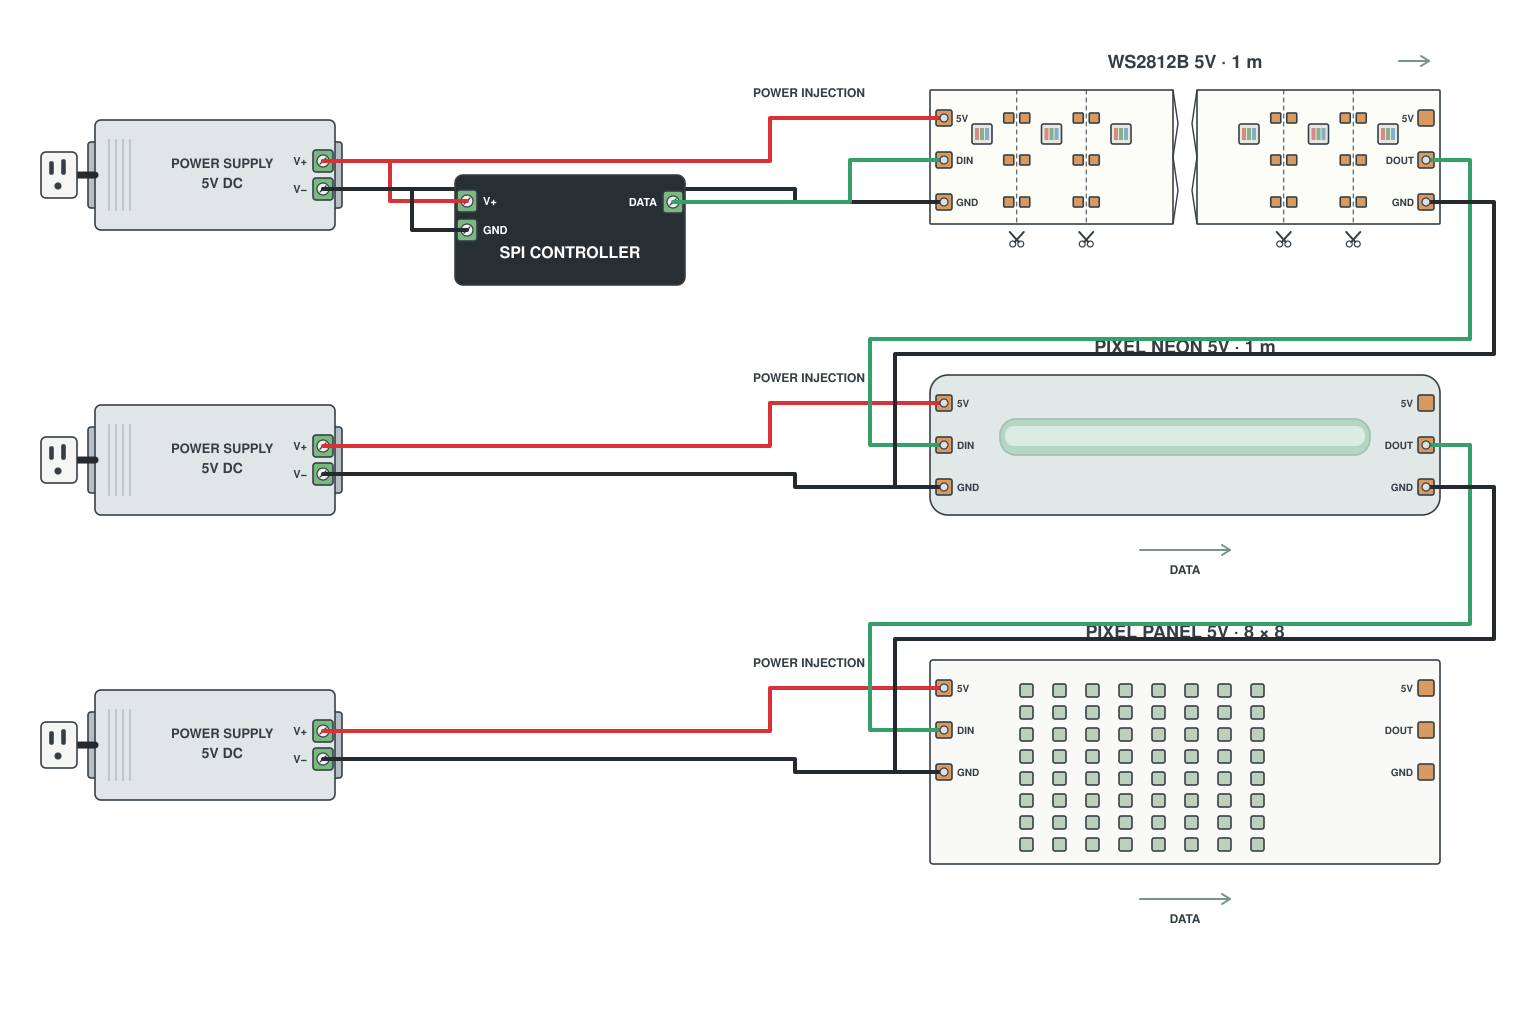
To size the supply for all letters together, see how to connect an LED strip to the power supply. Two more builds from our YouTube channel:
Installing led neon rope
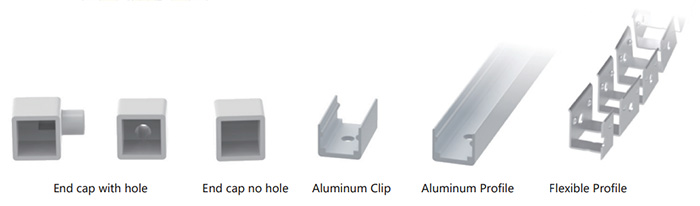
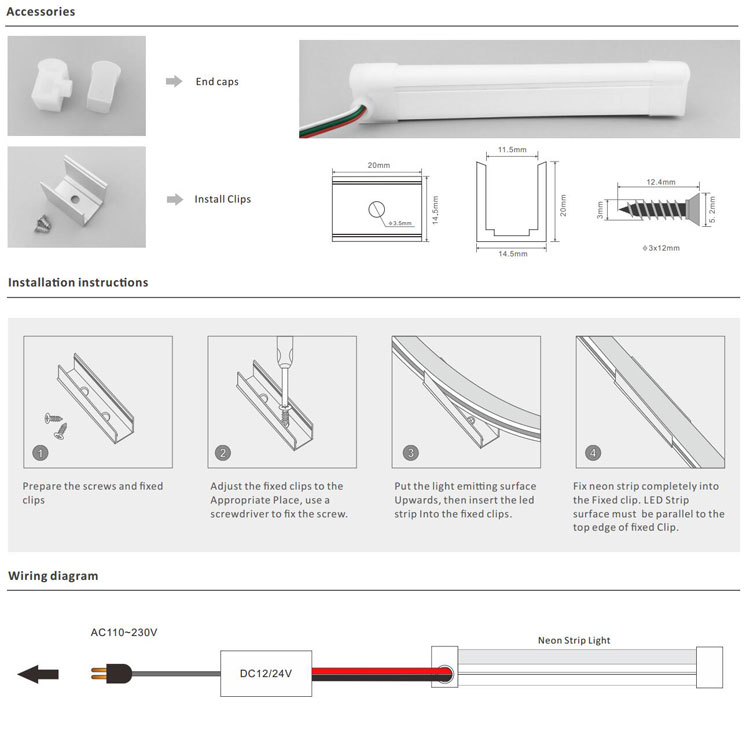
Led neon rope is fixed by aluminum clips. And you can also choose the aluminum profile and flexible profile to install led neon lights. Both ends of the led neon rope light need to be covered with end caps to protect the light strip inside from external force. The end cap which connects to the power supply or the controller has a hole to allow the wire to pass through.
►Step 1. Prepare the screws and fixed clips.
►Step 2. Adjust the fixed clips to the appropriate place, use a screwdriver to fix the screw.
►Step 3. Put the light-emitting surface upwards then insert the led neon rope into the fixed clips.
How to Repair Broken LED Neon Signs lights?
When we are transporting or installing, when the strip inside the neon tube is badly contacted or broken due to improper operation, we can also repair it according to the method in the following video to avoid bigger losses,
LED neon strip lights and accessories
Rather not thread the strip yourself? Choose ready-made LED neon. Browse all LED neon strip lights.
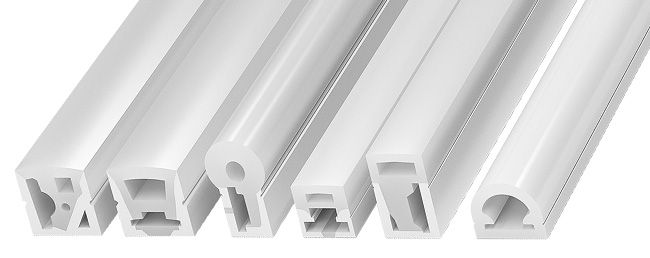 Silicone neon LED diffusersMake your own neon from any strip
 360 degree LED neon flexRound neon, light all around
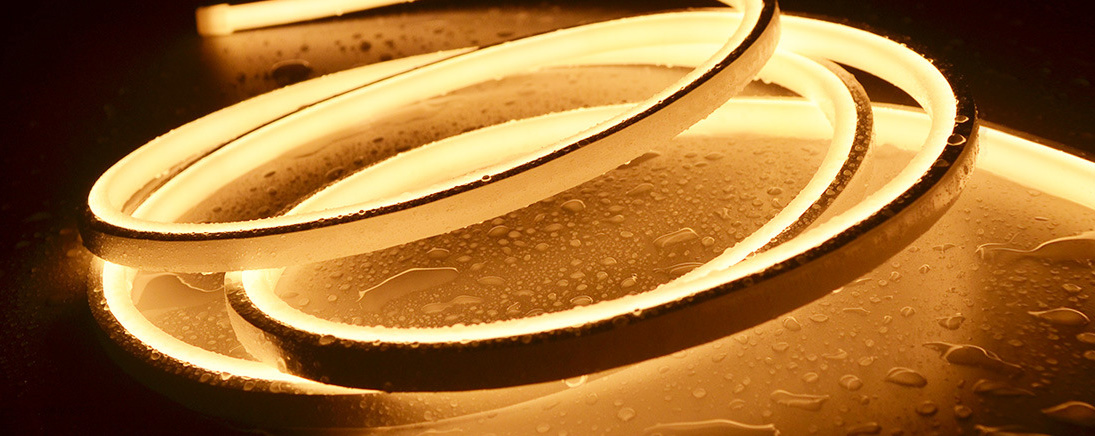 Single color LED neon light signsReady-made, one color
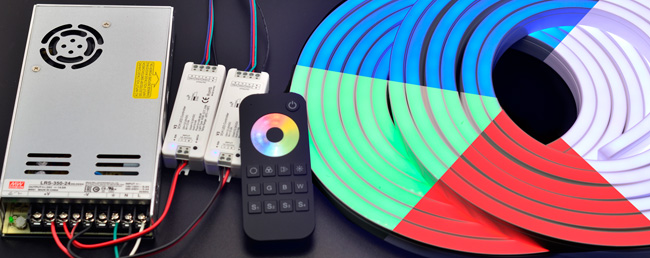 RGB LED neon lightsColor changing neon
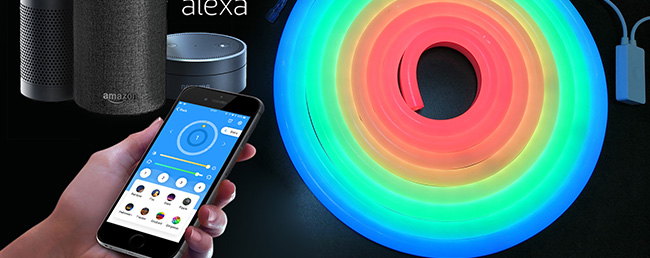 Addressable LED neon lightsPixel control and chasing effects
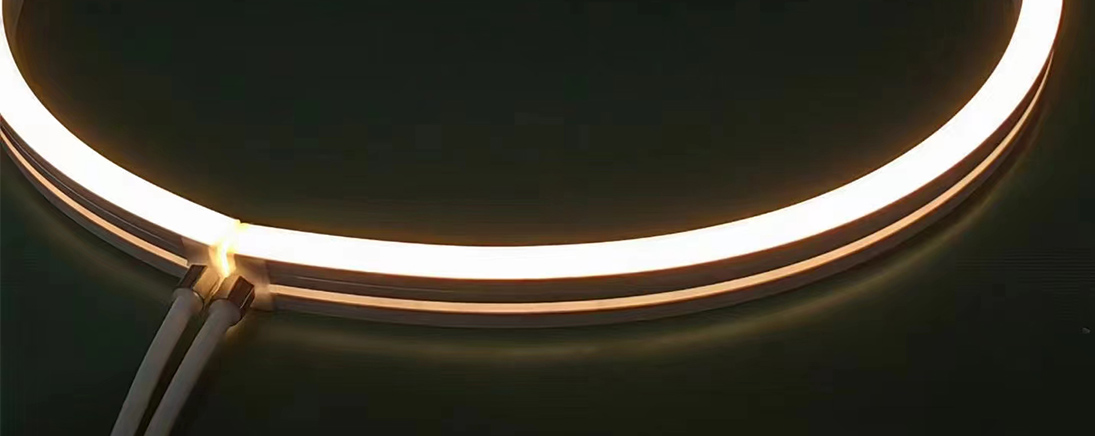 Injection molding LED neon rope lightMolded neon rope
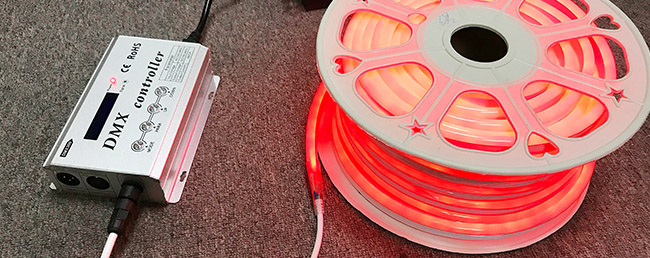 High voltage LED neon lightsLong outdoor runs from one plug
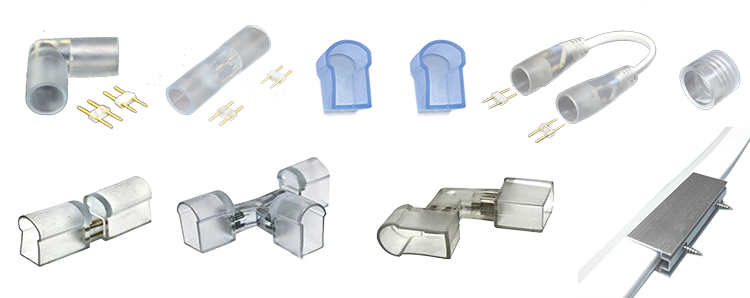 LED neon flex accessoriesEnd caps, clips, cutting scissors
LED neon FAQ
Can you cut LED neon rope light?
Yes, but only at the cut marks of the LED strip inside, which you see through the translucent line on the side of the tube. Lay the neon flat, make one clean cut with sharp scissors, then cover the new end with an end cap and silicone or adhesive and let it dry.
Can I use any LED strip to make LED neon lights?
Yes. All LED strips can wear neon tubes, including RGB color changing and addressable dream color strips. The tube inner width must be the same as the strip PCB width, or wider.
How do I get an LED strip into a neon tube longer than 3 meters?
Tie the traction line to the strip, aim an air gun into the silicone tube and press the switch: the air pushes the strip and the line to the far end, and you pull the rope. With the strip and tube kept straight this works for 5-10 m and even 10-30 m.
Can two cut pieces of LED neon be joined back together?
Once cut, each piece is independent and cannot be restored into one. If you must connect them, solder the strips of the two sections, glue the tubes together and put heat-shrink tubing over the joint.
How do I wire a DIY LED neon sign with several letters?
Make each letter a separate piece with its feed wire at the start, bring every feed wire to one power supply behind the panel and wire the letters in parallel. Cap and seal the far end of each piece, keep the bend radius above 10 cm and never bend the neon flat-wise.
Send us your design, the size and the color you want, and the SuperLightingLED team will match the LED strip, neon tube, end caps and power supply, or quote a custom sign. Standard orders such as accessories and controllers ship within 24–48 hours; LED strip orders follow the production lead time shown on the product page. Contact our team · Custom lighting services